Workload
The Workload view is designed to help with project planning, task assignments and resource management. It displays events and tasks assigned to a user in a timeline view and supports hourly-based time allocation mode.
Interface overview
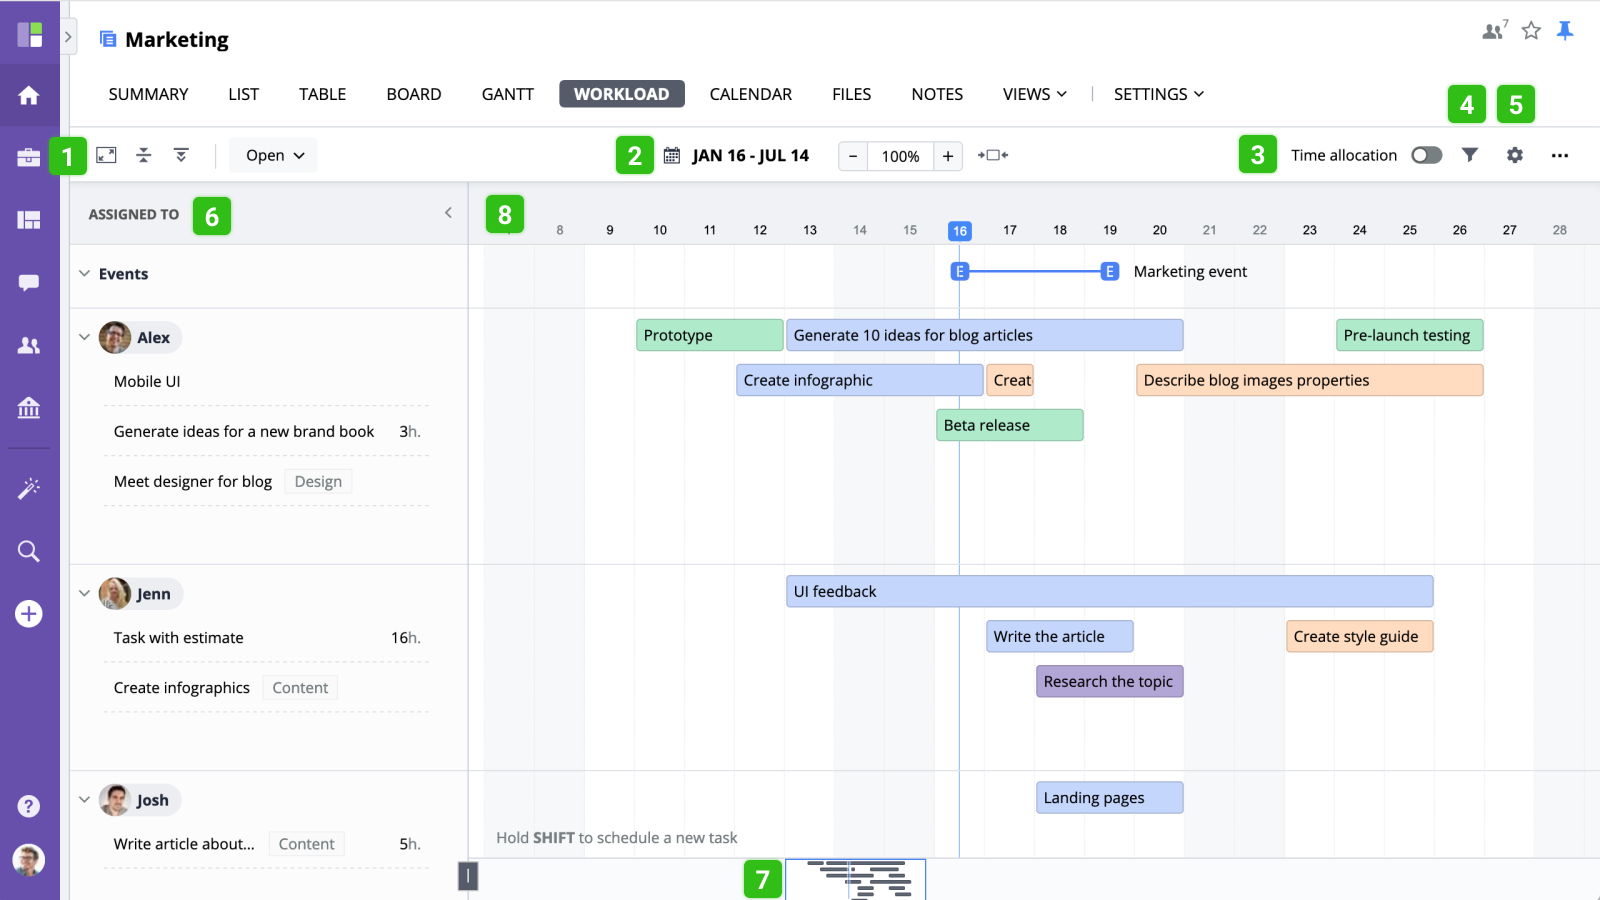
- Full-screen mode
- Current date range
- Time allocation mode switch
- Filters
- Workload view settings
- User's backlog
- Preview & quick navigation
- Timeline with planned tasks & events
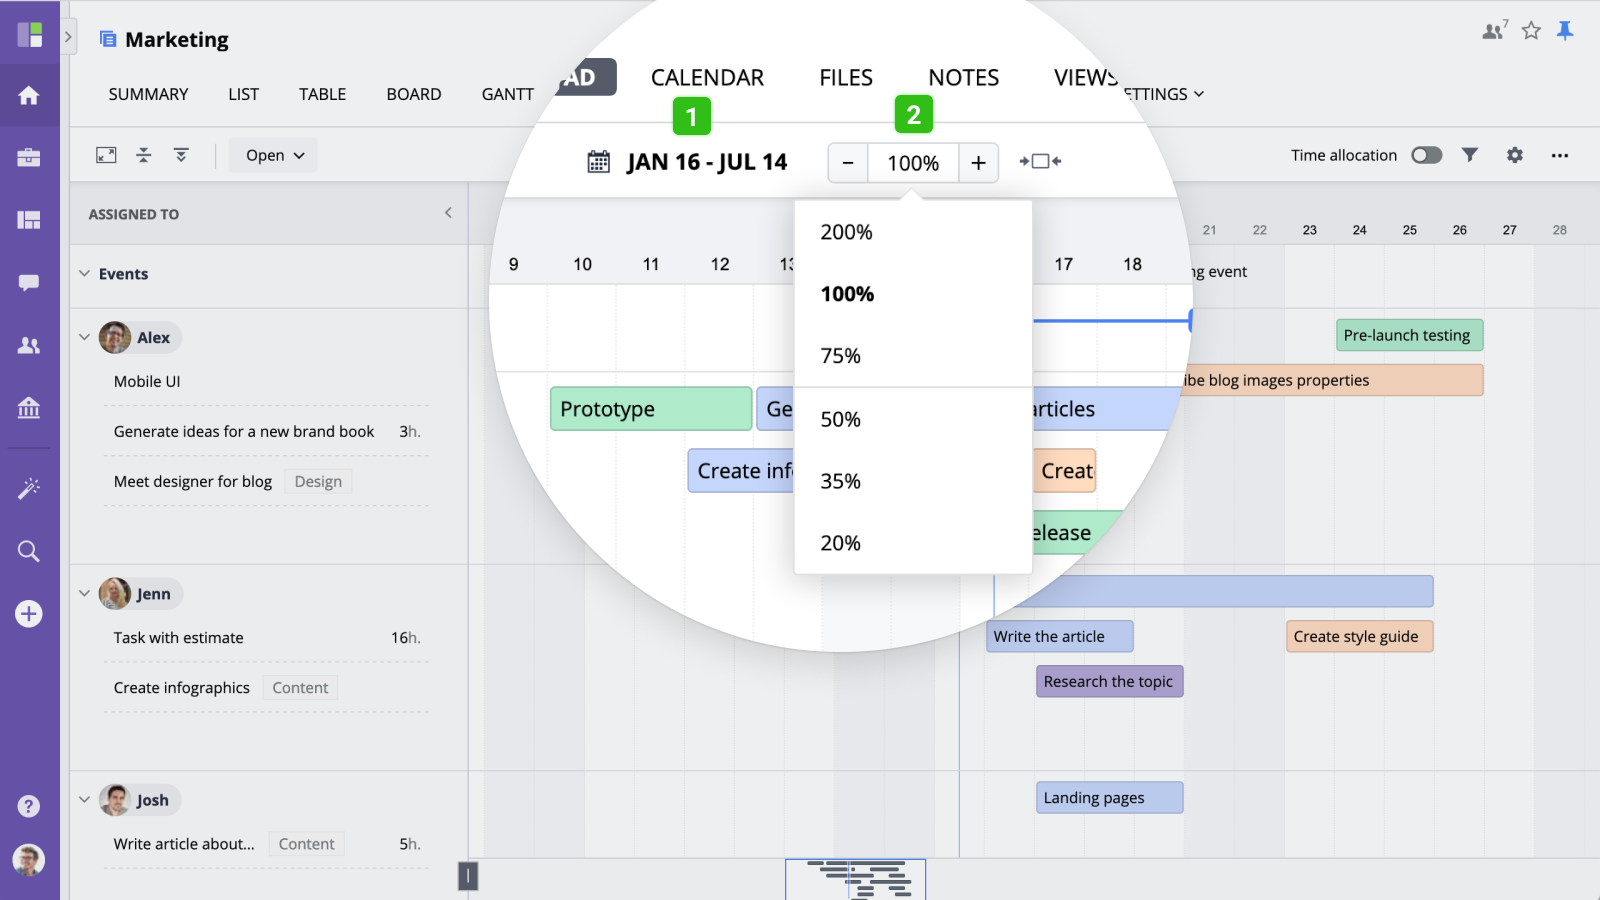
Navigation & Zoom
Click the current value to change the workload view time range:
When time allocation is turned off, you can also zoom the view by clicking +/- buttons or selecting zoom value from a list.
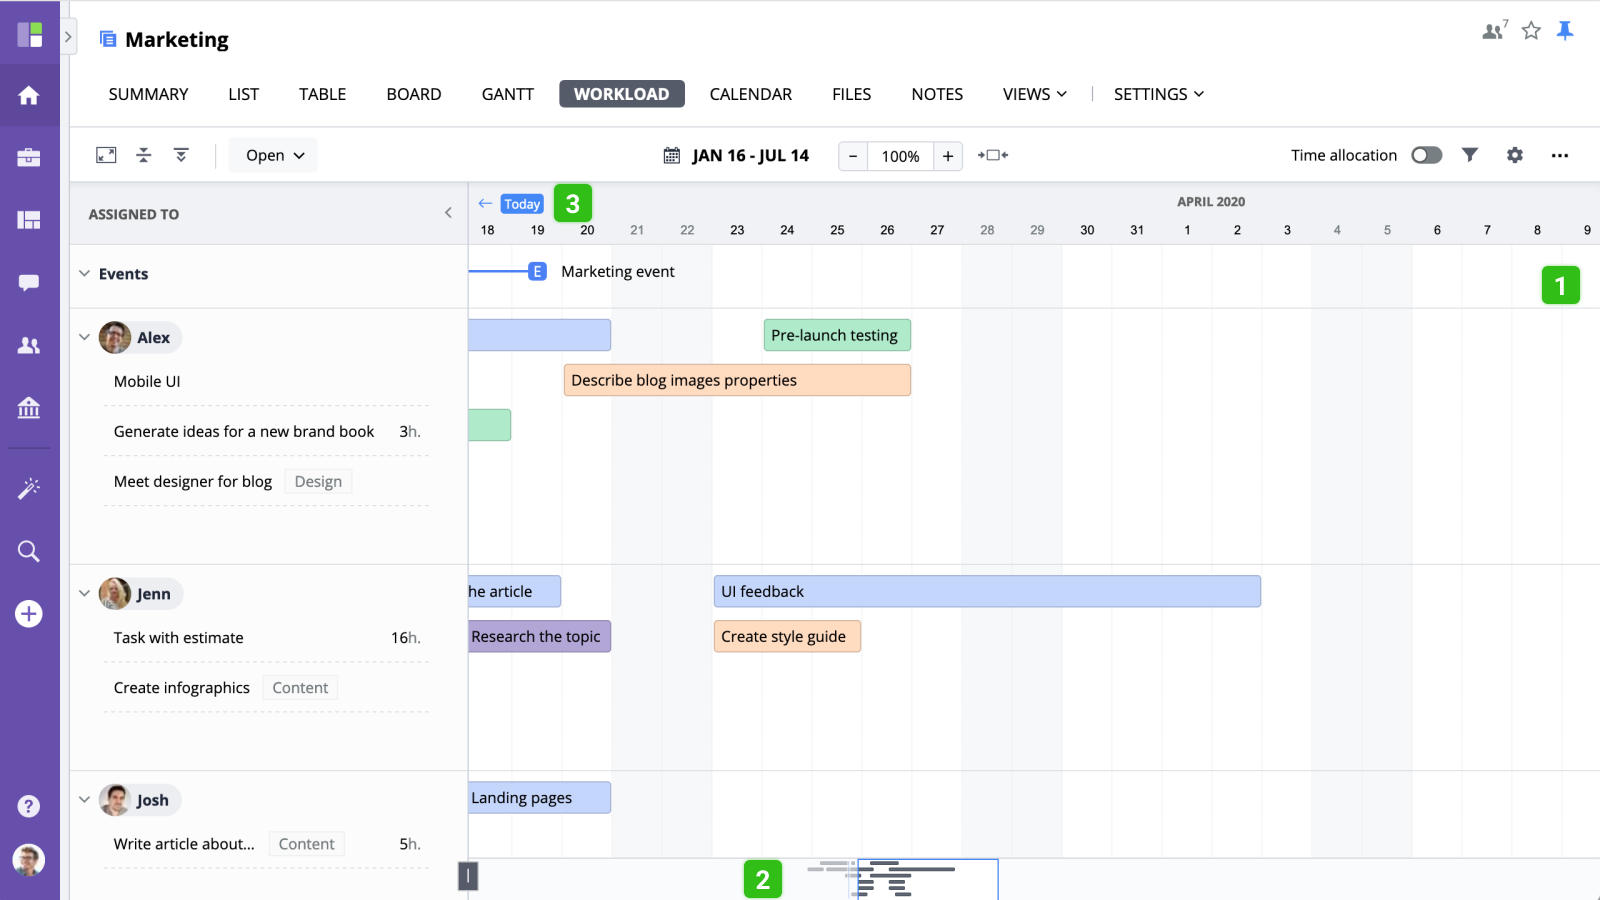
To scroll the timeline, click anywhere within the preview area or drag and drop the timeline itself . To return to the current date, click the today button .
Working with Timeline
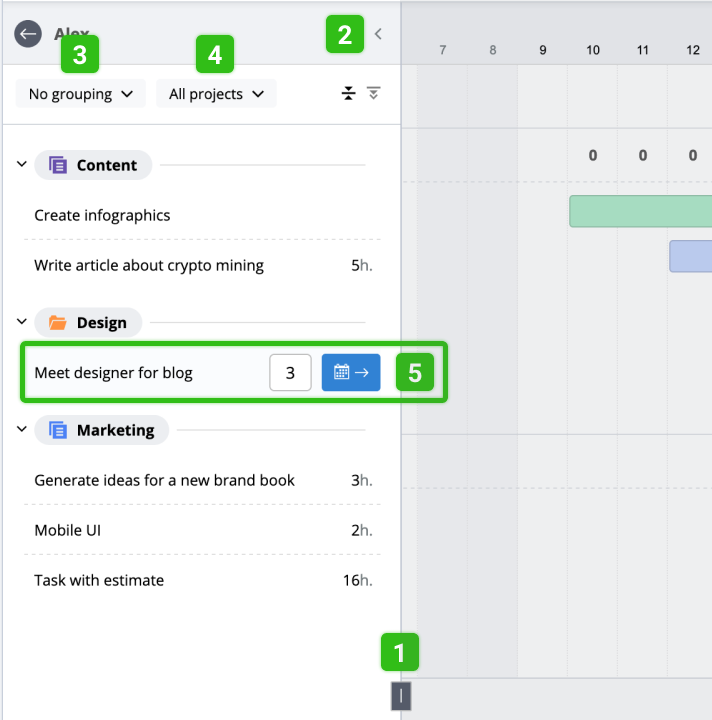
To change a task's start date, use drag and drop to move it within the timeline.
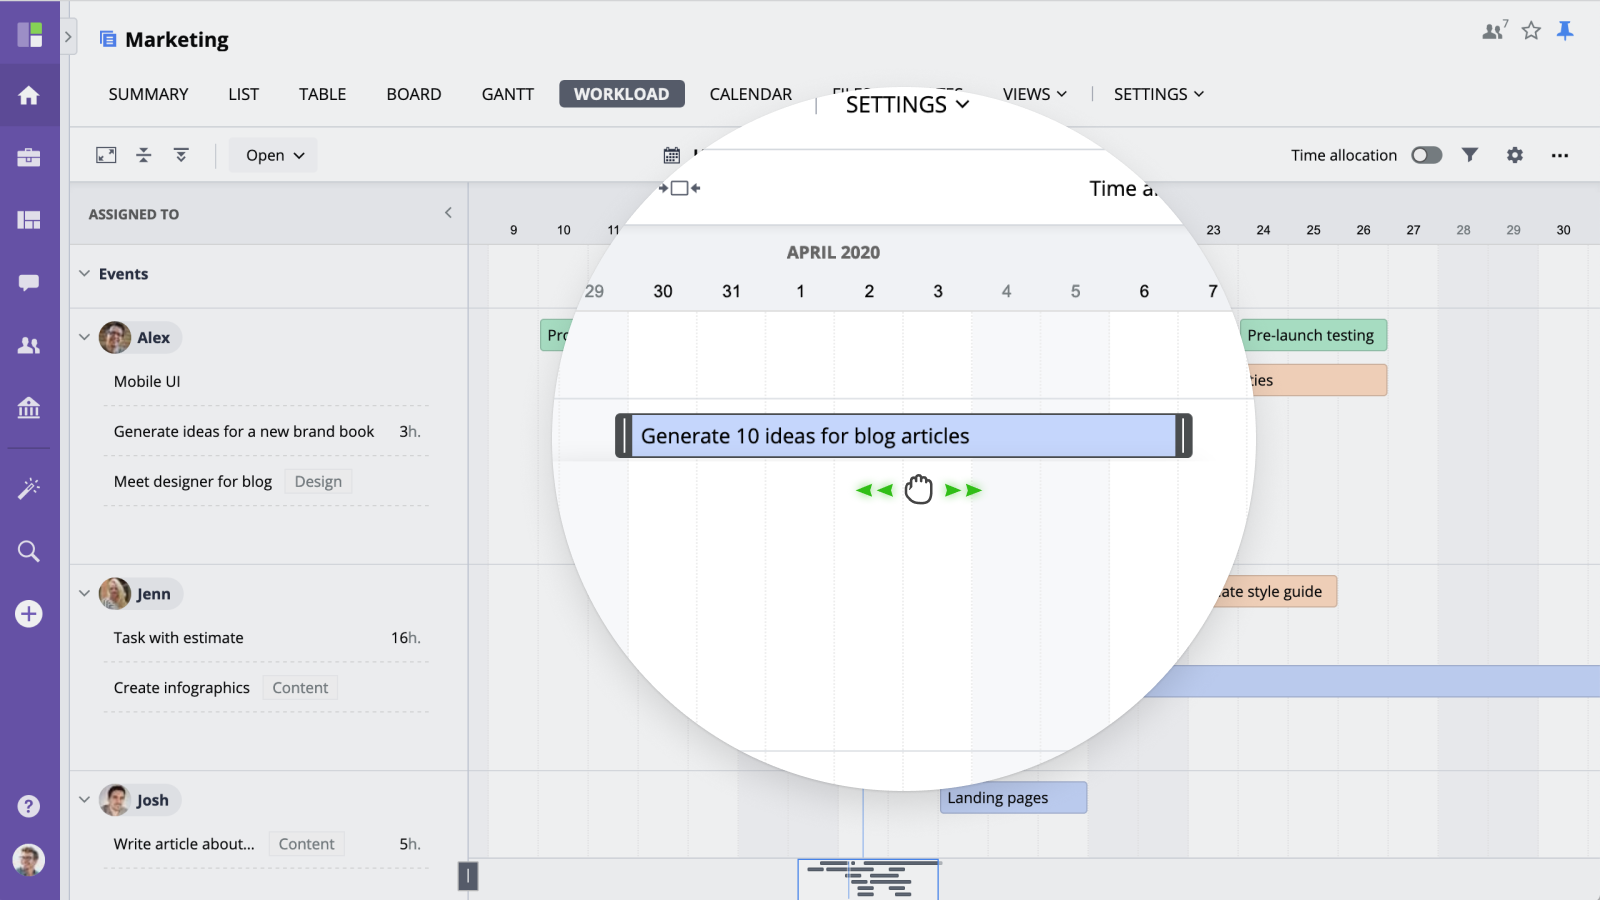
To change task's duration, mouse-over a task and use the dark borders on the left and right to change the task's start and end dates accordingly.
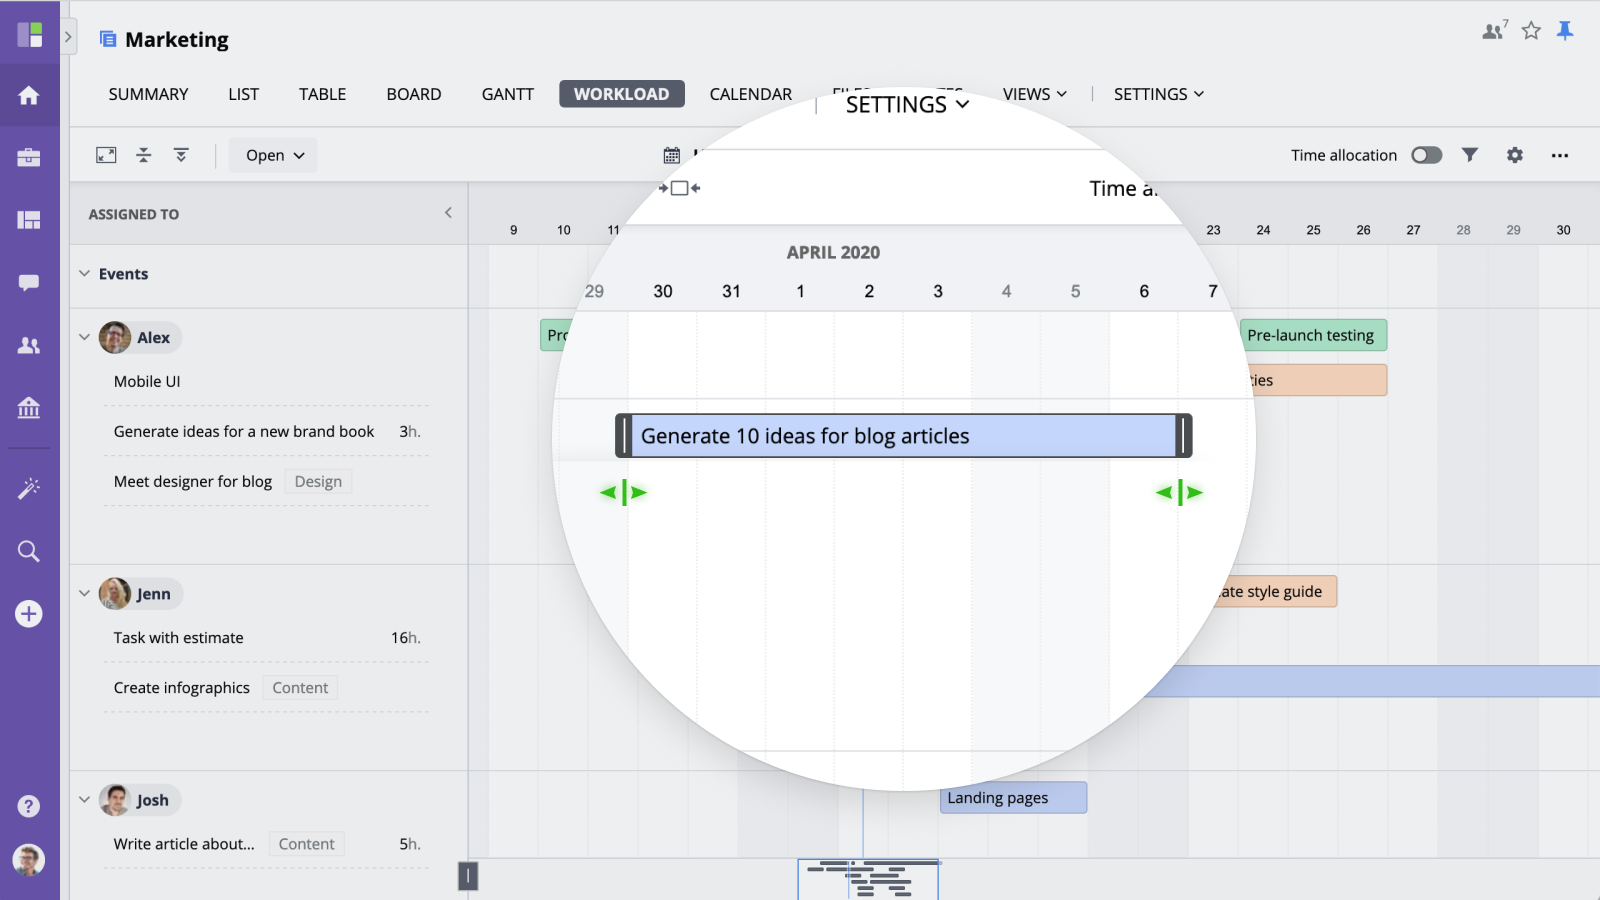
When you mouse-over a task, a small popup with task details will appear:
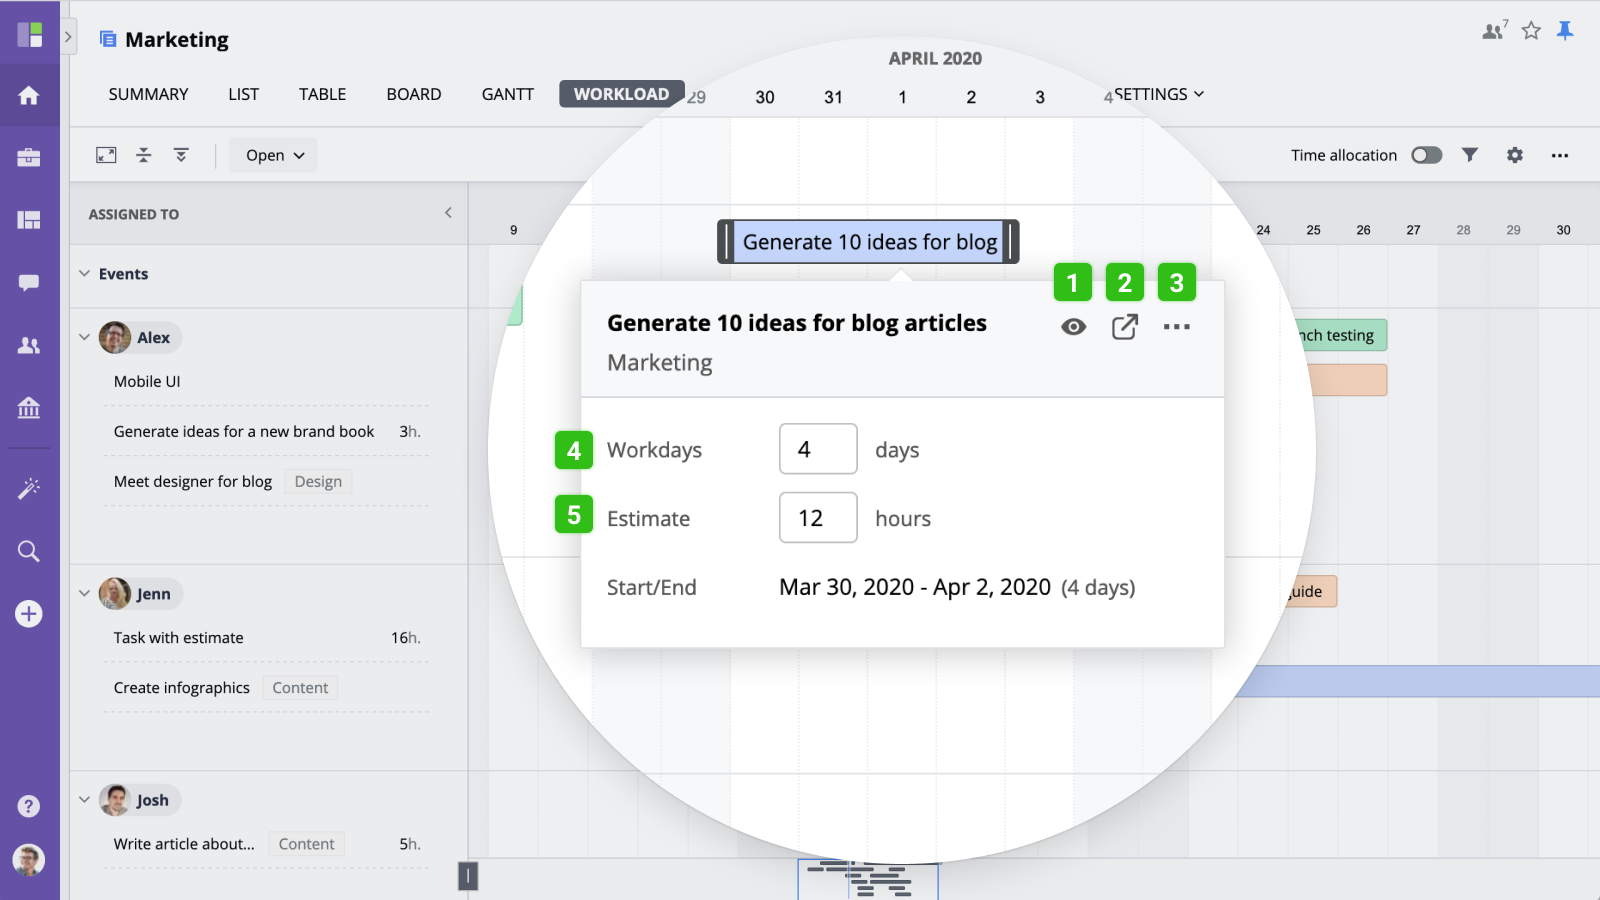
Click the view button to open a task, new window button to open a task in a new window and more button to access the task's quick management options.
To change task's duration, enter the number of workdays in the workdays input area Use estimate input to set/update the estimated number of hours required to complete the task.
Time allocation
To enable time allocation mode, toggle the time allocation switch in the right area of the workload controls panel

Once enabled, you will see the total number of allocated hours for each day in the top area of the timeline.

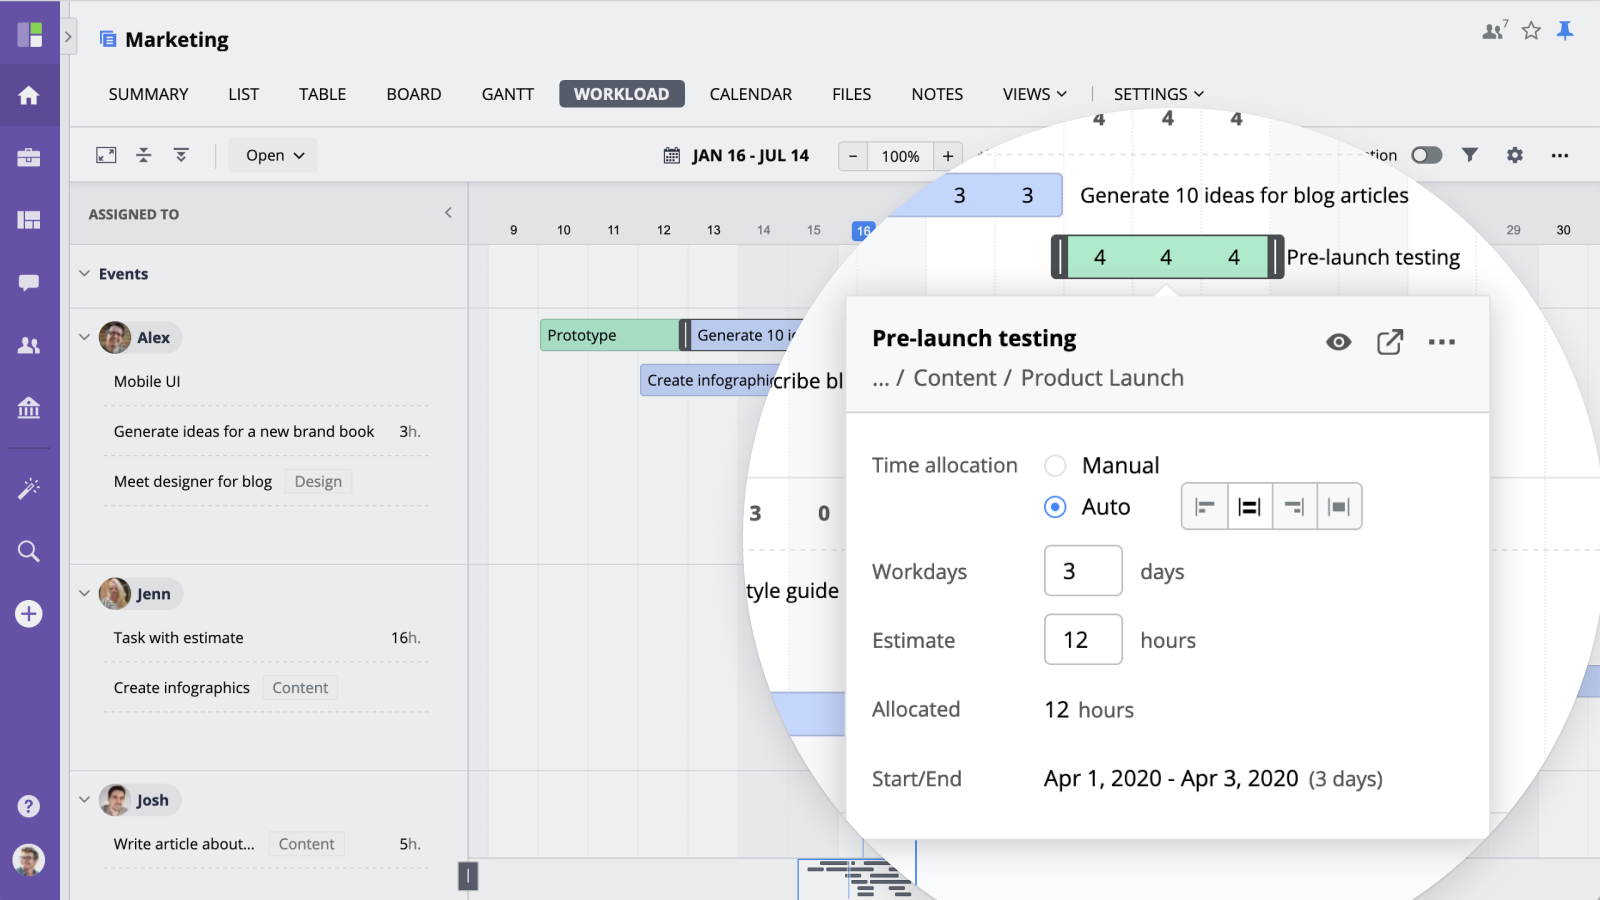
To allocate/update hours for a specific task, mouse-over it and select the time allocation mode: manual ot automatic:
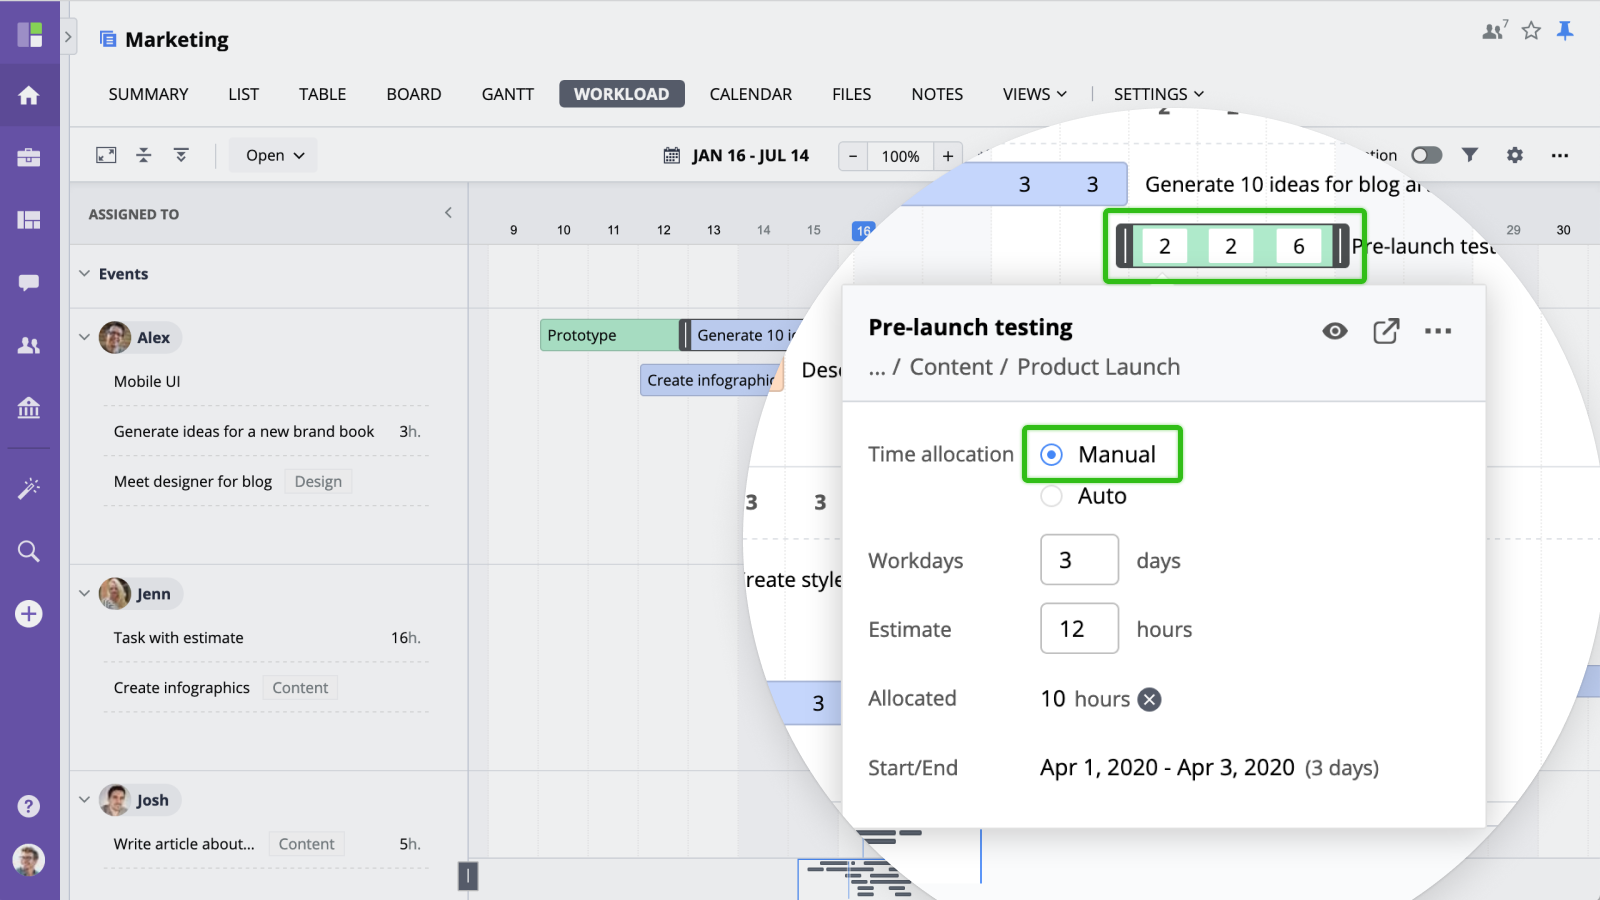
Manual allocation
To enter hours manually (or update existing time allocation), select the Manual mode and either click the edit button or click the task bar in the timeline itself. Then, you can enter the hours estimated for each day into the input boxes. To exit manual allocation mode, click anywhere outside of the task bar.
Automatic time allocation
To allocate hours automatically, enter task's estimate time and select "Automatic" option. GoodDay will analyze user's load and make the best possible time allocation within the planned start/end dates range.
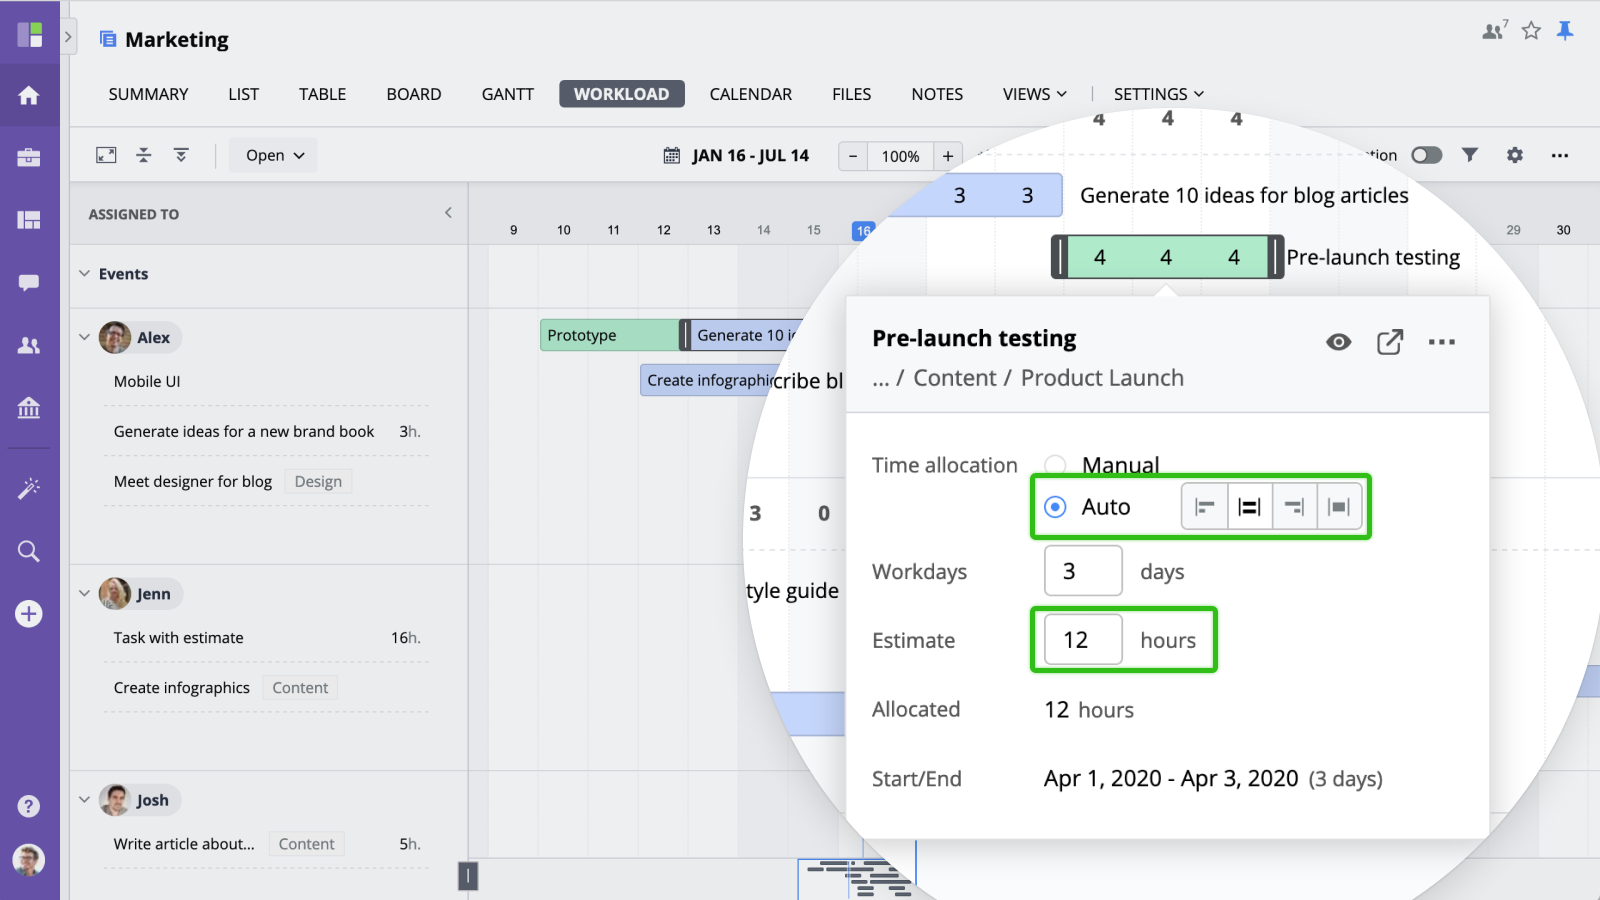
The following auto-scheduling modes are supported:
- Front load - will try to allocate hours starting on the earliest possible work day
- Back load - will try to allocate hours starting on the latest possible work day
- Evenly - even distribution of hours between all work days
- Full day - allocates full day (8 hours) for all workdays, ignoring the task's estimate
Backlog
User's backlog displays tasks assigned to user which are not planned yet. You can change this backlog panel size by dragging the resize button or minimize by clicking the arrow button .
Backlog tasks list comes with built-in project/folder filter and group by options .
Auto-planning
To automatically schedule a task, mouse-over a task , enter the estimated time and click Auto plan button. Goodday will analyze workdays and planned work, find the next available time slot and automatically allocate work hours (if time allocation mode is enabled).
Manual planning
To manually set work schedule for a task in backlog, drag and drop this task into the timeline and then adjust the duration by resizing the task.


