Timeline
- Overview
- Working with Timeline
- Zoom in/Zoom out - Fit to Screen
- Tasks List
- Create New Button
- Sorting
- Dependencies
- Refresh Button
Overview
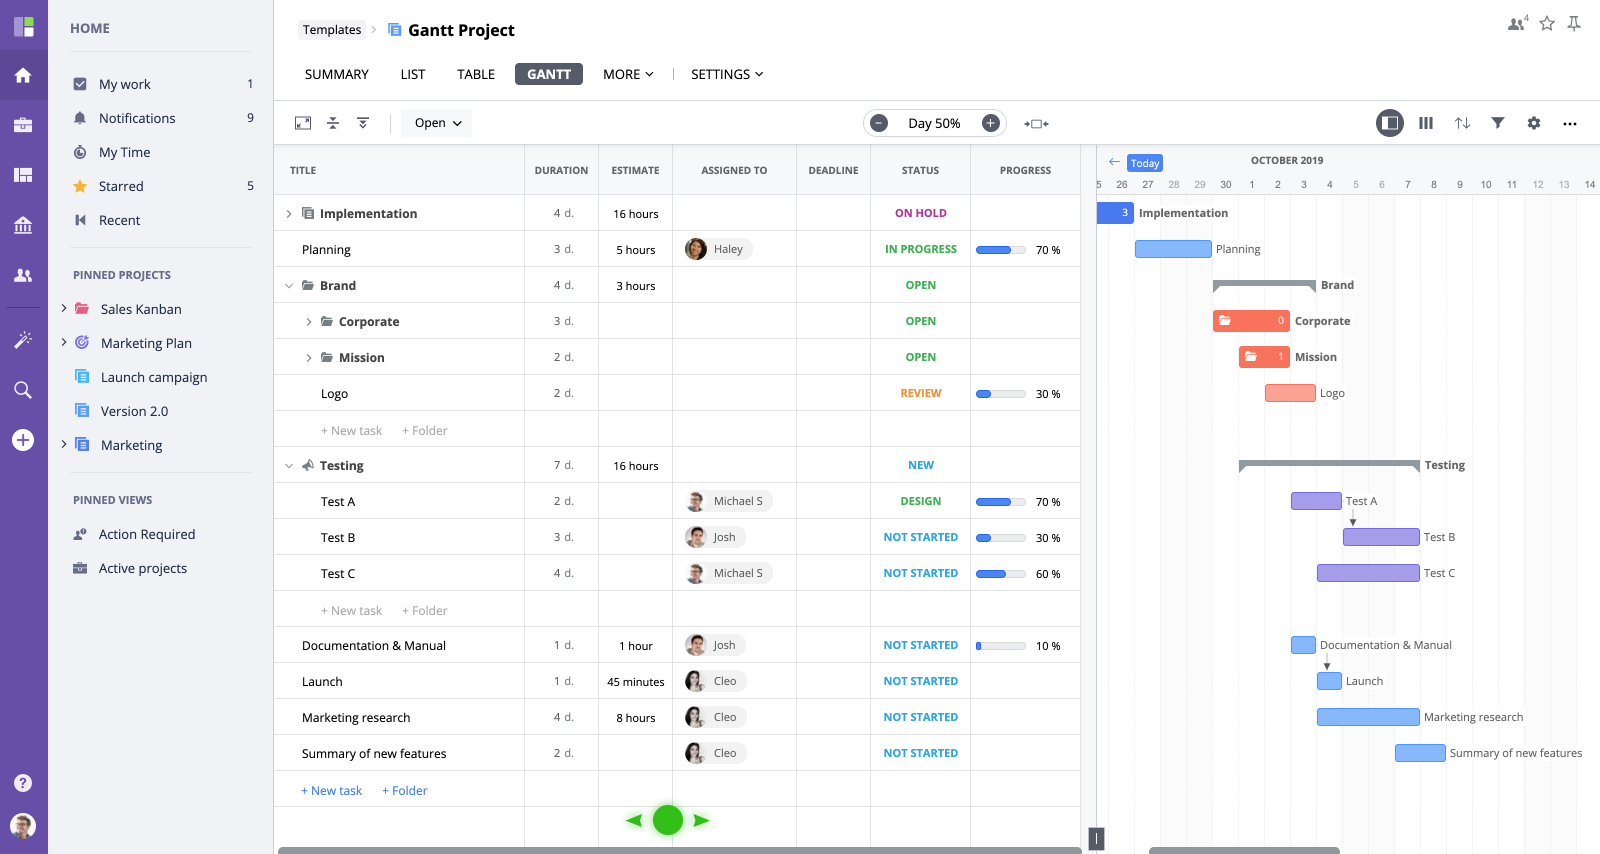
A Gantt Chart is allows you to plan and schedule your work activity in the project. It is named after Henry Gantt who invented this chart type. To use a Gantt Chart, navigate to Timeline menu item in the project menu.
Gantt Chart allows you to create tasks, dependencies between tasks, reschedule your current tasks, and create projects/folders. It consists of the task list on the left side and a Gantt Chart on the right side of the Timeline.
Working with Timeline
Moving a task
You can set another date for the previously created task in the Timeline. Proceed to Gantt chart - right side of the Timeline - and move the mouse over the task bar. Click on it and now you can move this task bar to any other date.
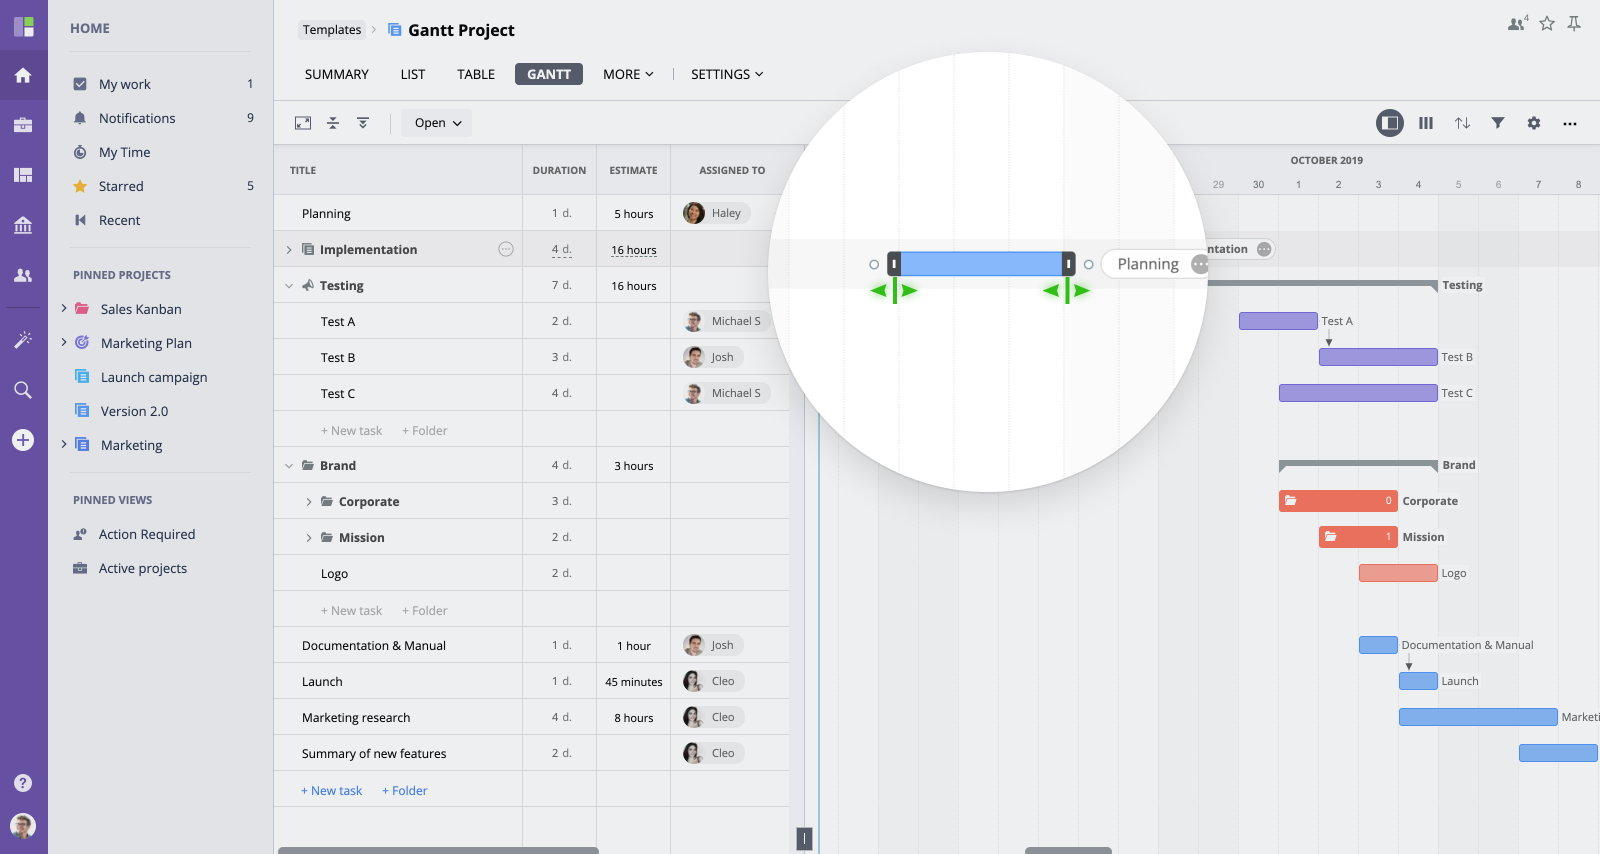
Reschedule
You can also set new start/end dates for tasks in the Timeline by moving the mouse pointer to the right/left sides of the task bar in the Gantt chart. You will notice that the mouse pointer changes its shape and you can move the dark borders of the task bar - either to the left or to the right. Moving the borders of task bars will increase or decrease the duration of your tasks in the Gantt chart in the Timeline view.
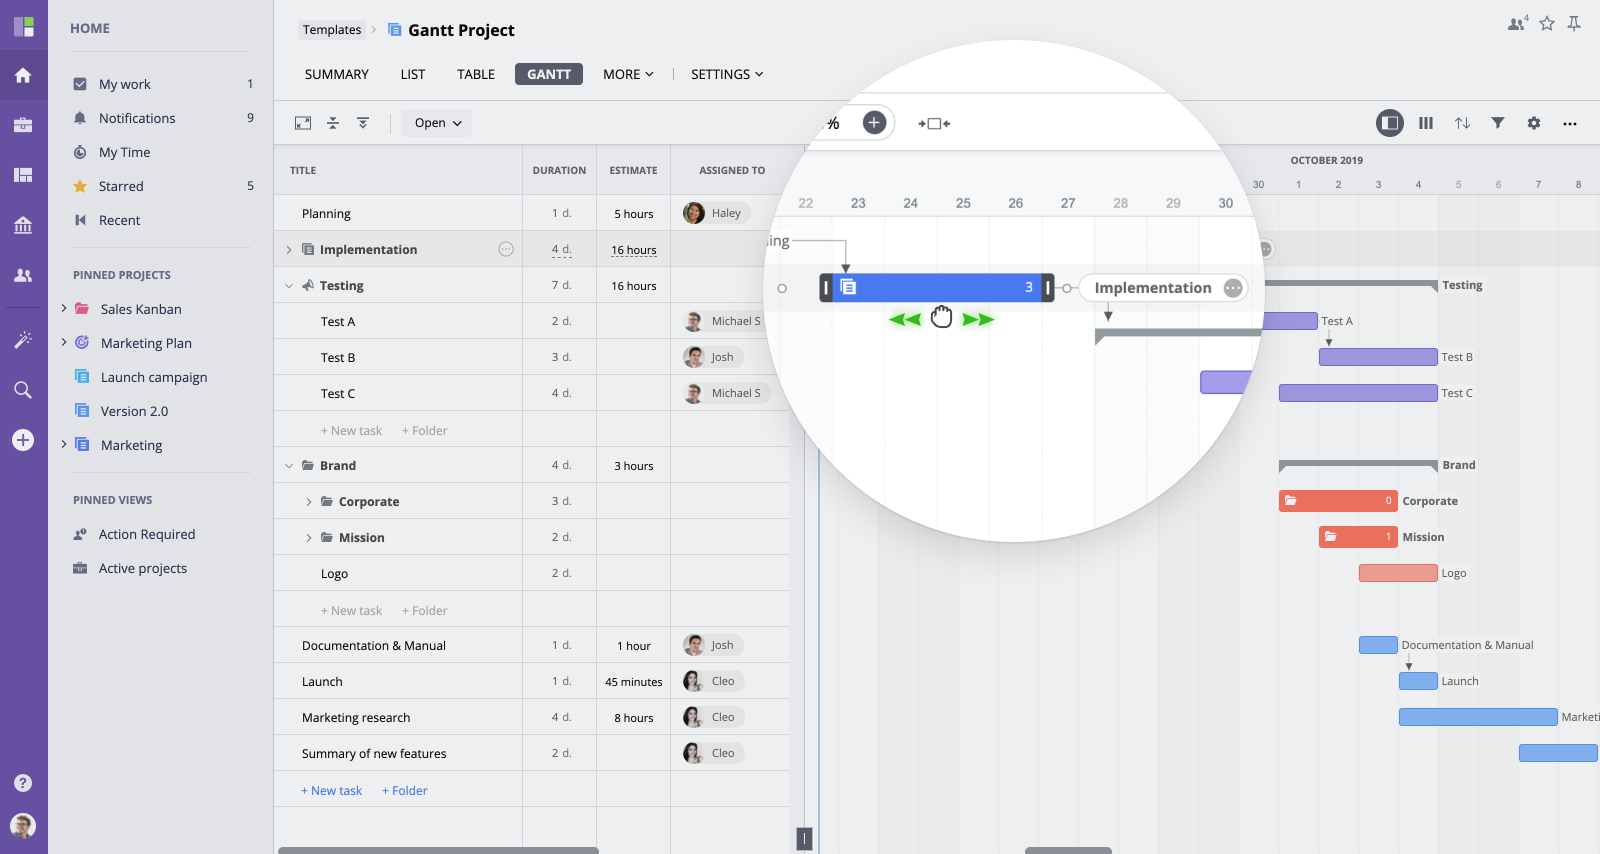
Drag and drop
You can drag and drop the task bar in the Gantt chart by clicking on the task bar and moving it to the desired date.
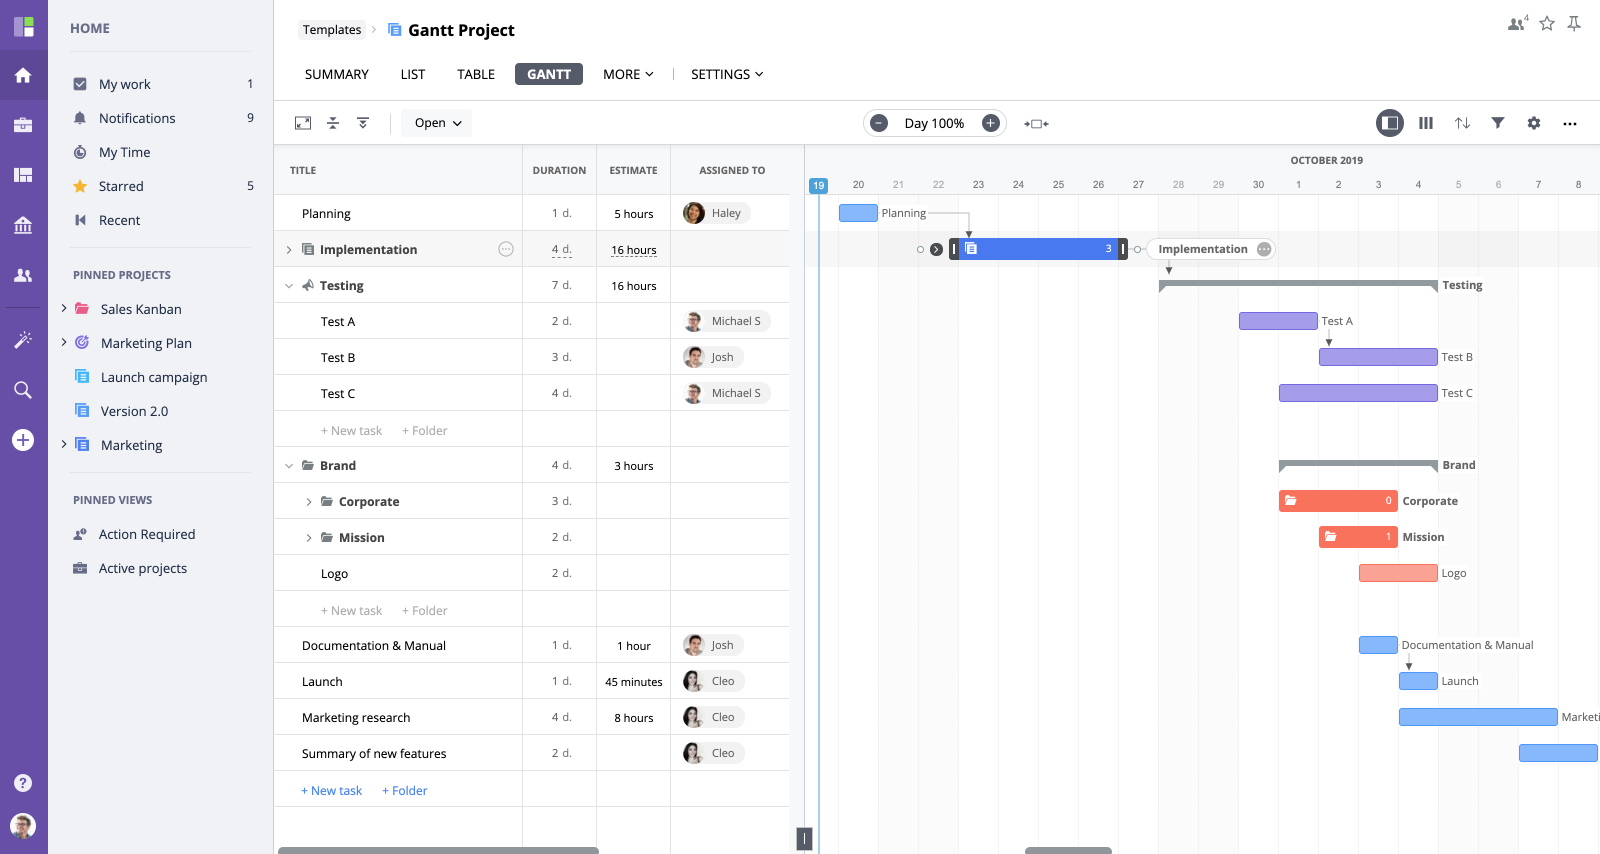
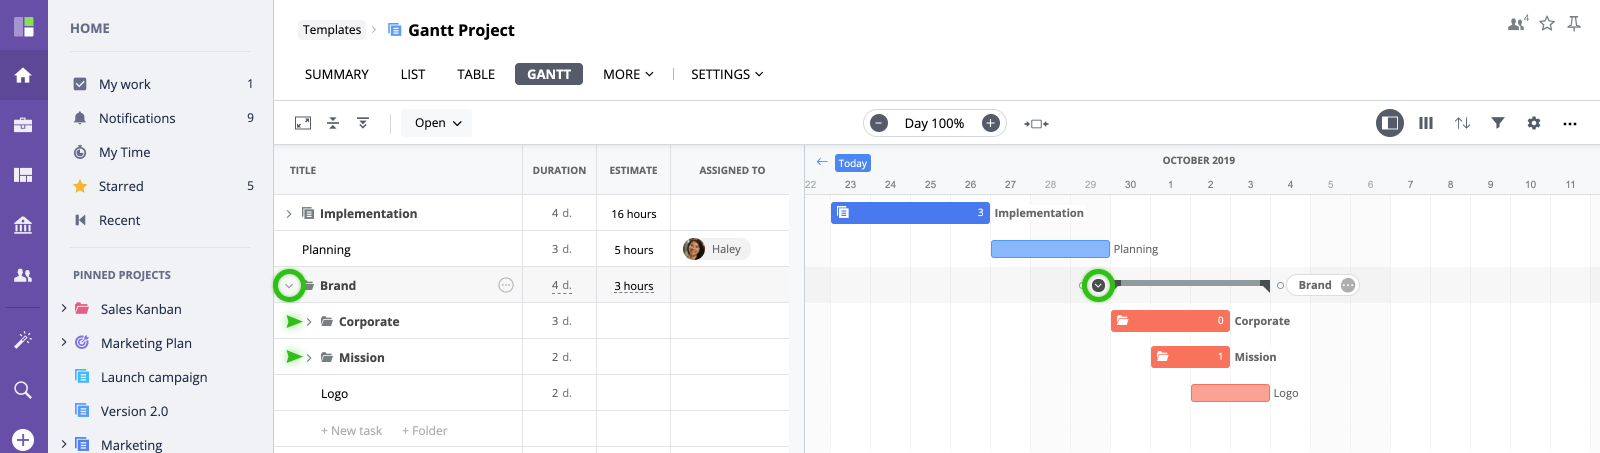
Maximize/Minimize folders in Gantt chart
You can view the contents of projects/subprojects in the Timeline view. Workfolder bars are different from task bars: workfolder bars are grey while task bars are blue. You can show/hide workfolder contents if you double-click on the corresponding bars in Gantt chart.

Please note that once you click on bars, they will expand in the left section of the Timeline, in the task list.
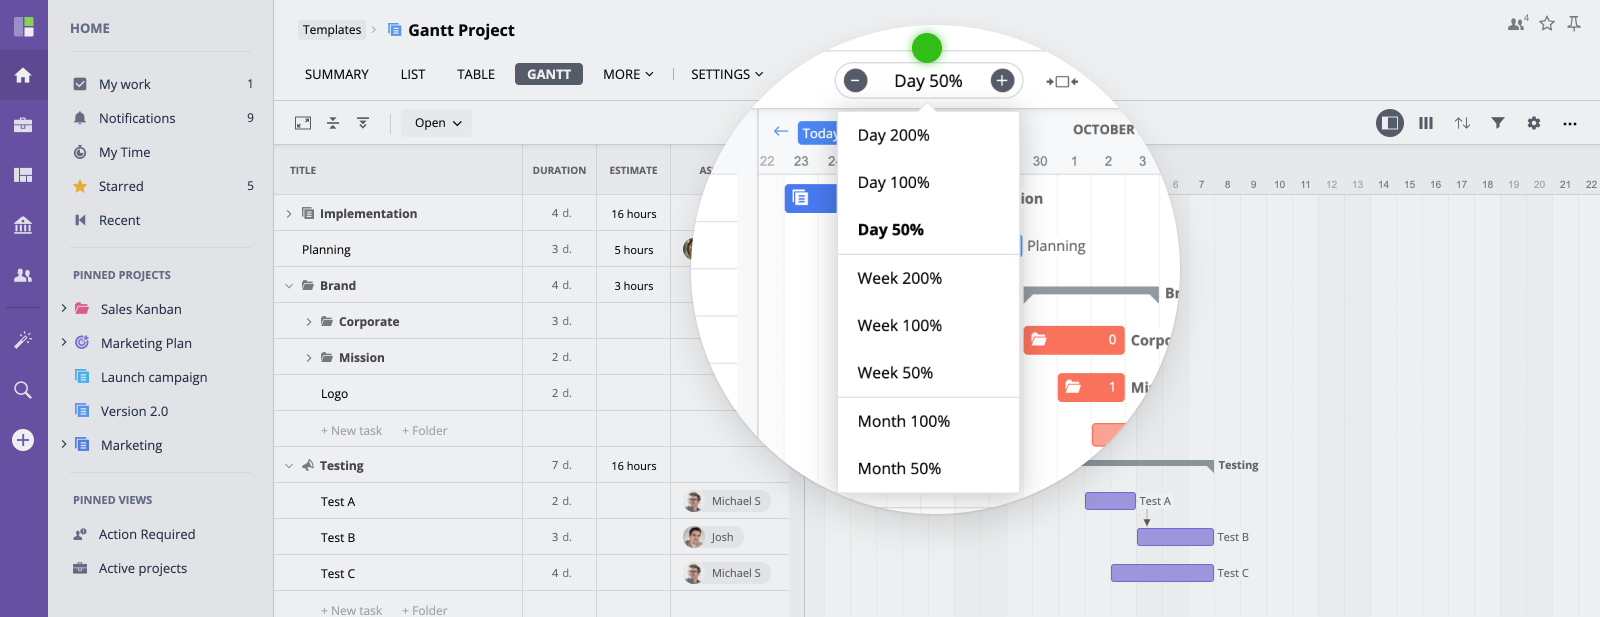
Zoom In/Out - Fit to Screen
You can zoom your project view in or out and see all tasks which are set for the rolling year period for your current project. Scale the project view by pressing on the left or right sides of the zoom bar. Or, you can do the same by pressing on '-' button to the left of the zoom bar or on '+' sign to the right of the zoom bar.
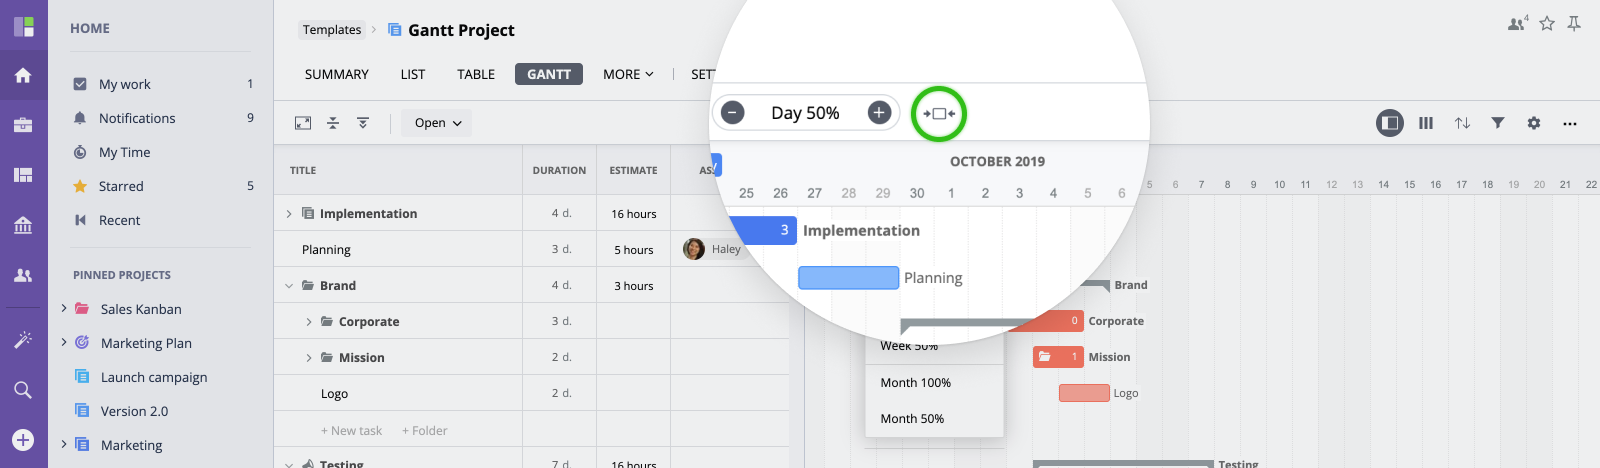
Fit to screen
By clicking Fit to Screen button, you will return to the current date of your project in the Gantt chart. The calendar will be adjusted to your current screen size automatically.
Tasks List
By clicking the Columns button, you will be able to select the columns you wish to view in the Tasks List. You can add and later manage values in these columns - ID, Title, Task type, Start and End dates, Estimate, Assigned to, Action Required, Deadline, Status, Priority and Schedule. In order to add/hide any column - click the Columns button and check or uncheck the checkbox next to it.
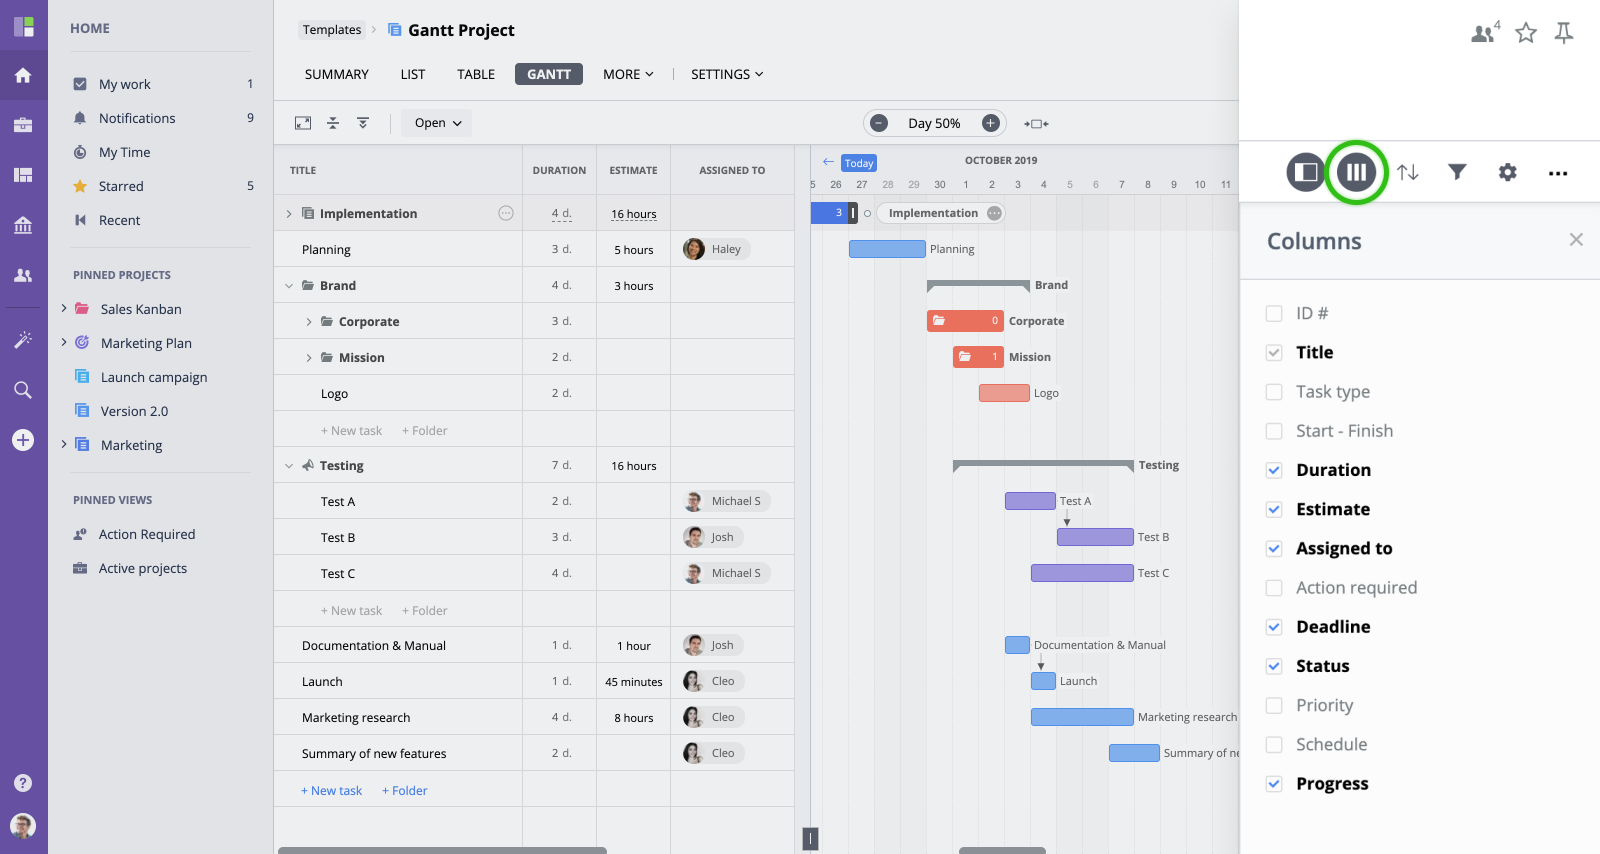
You can use the horizontal scroll to navigate and view the column you need or simply make the left section wider by moving the vertical line between the left and the right part of the Timeline.
Inline edit
You can make changes to task field values right in the Tasks List. Just add task field/column you need to update, then navigate to this column and add/change the value in the corresponding cell.
Create New Button
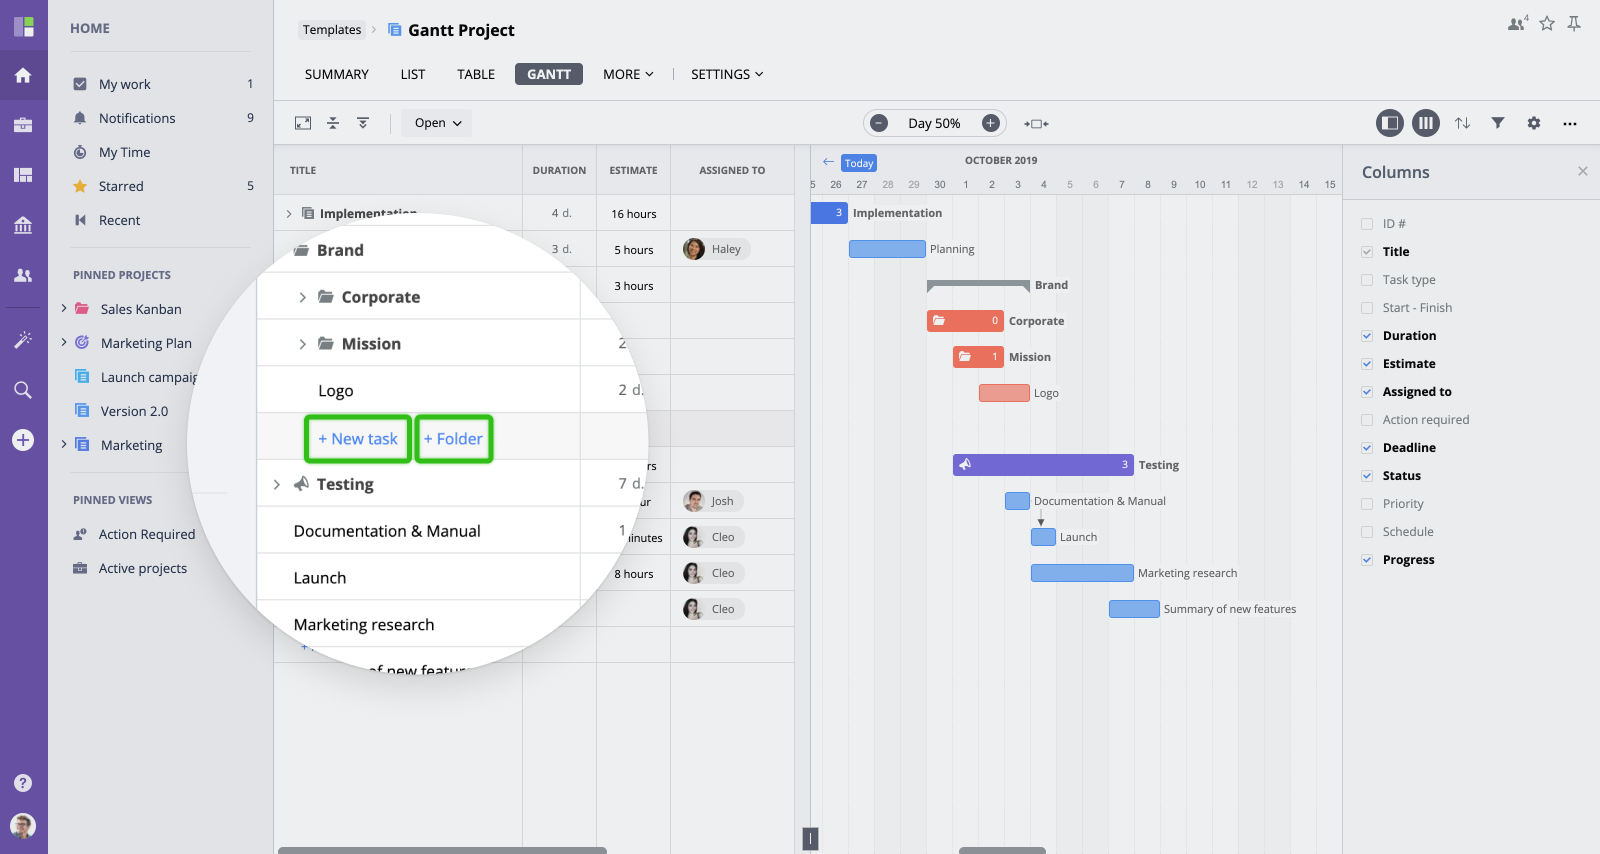
You can create a new task, workfolder, or project/subproject in the Tasks List view in Timeline.
Click the + New task, + Folder buttons.
+ New task allows you to create a task in inline mode.
+ Folder allows to create a folder the same way.
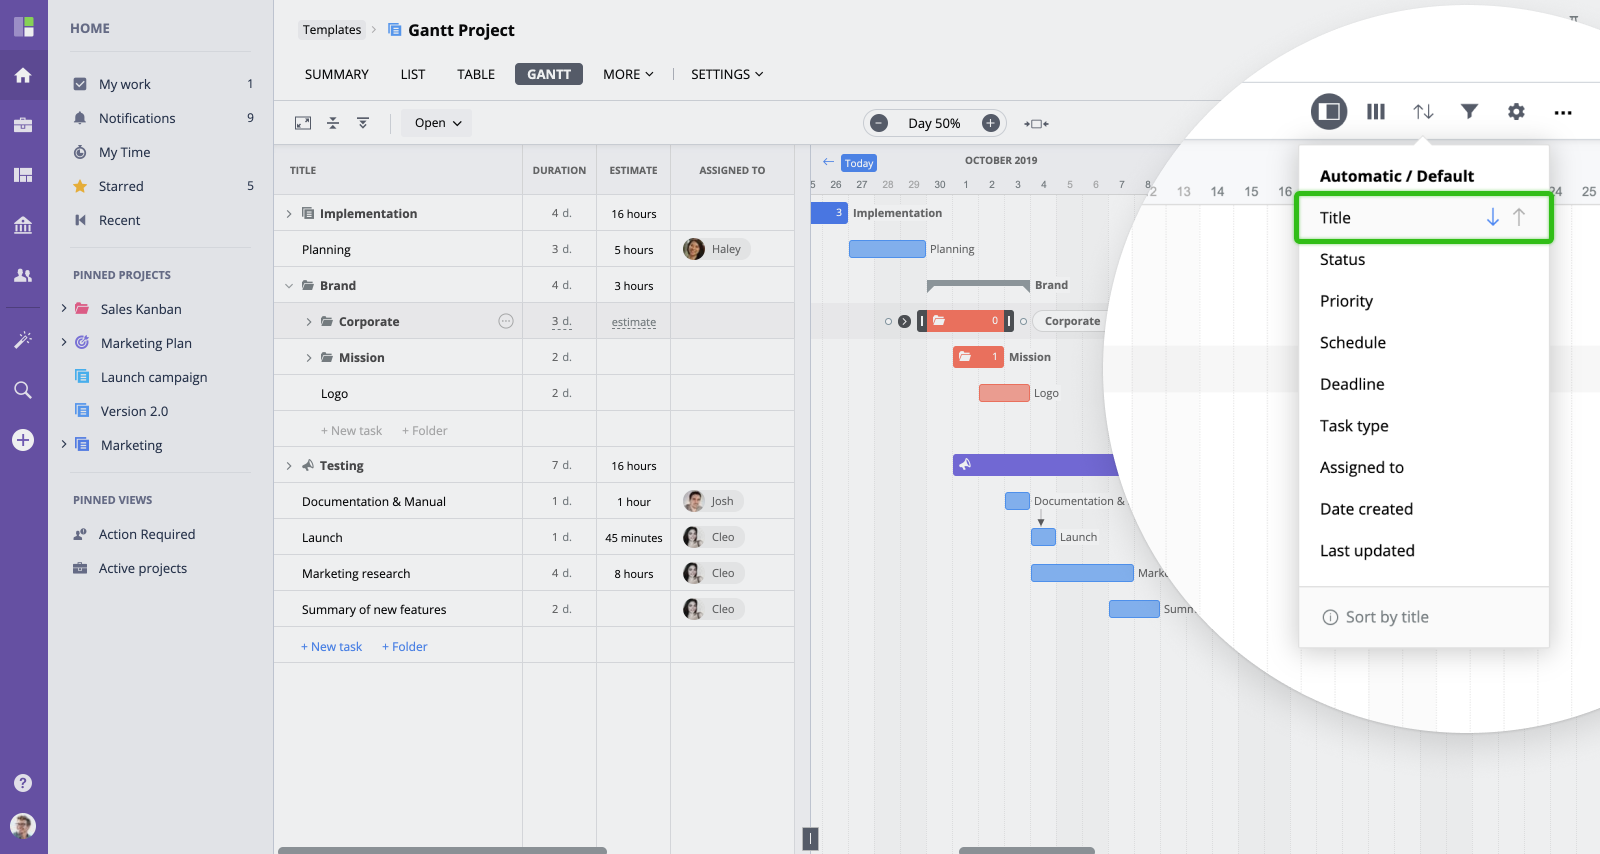
Sorting
You can sort all your data in Timeline view by following criteria:
- Default
- Title
- Status
- Priority
- Assigned to
- Actioned Required
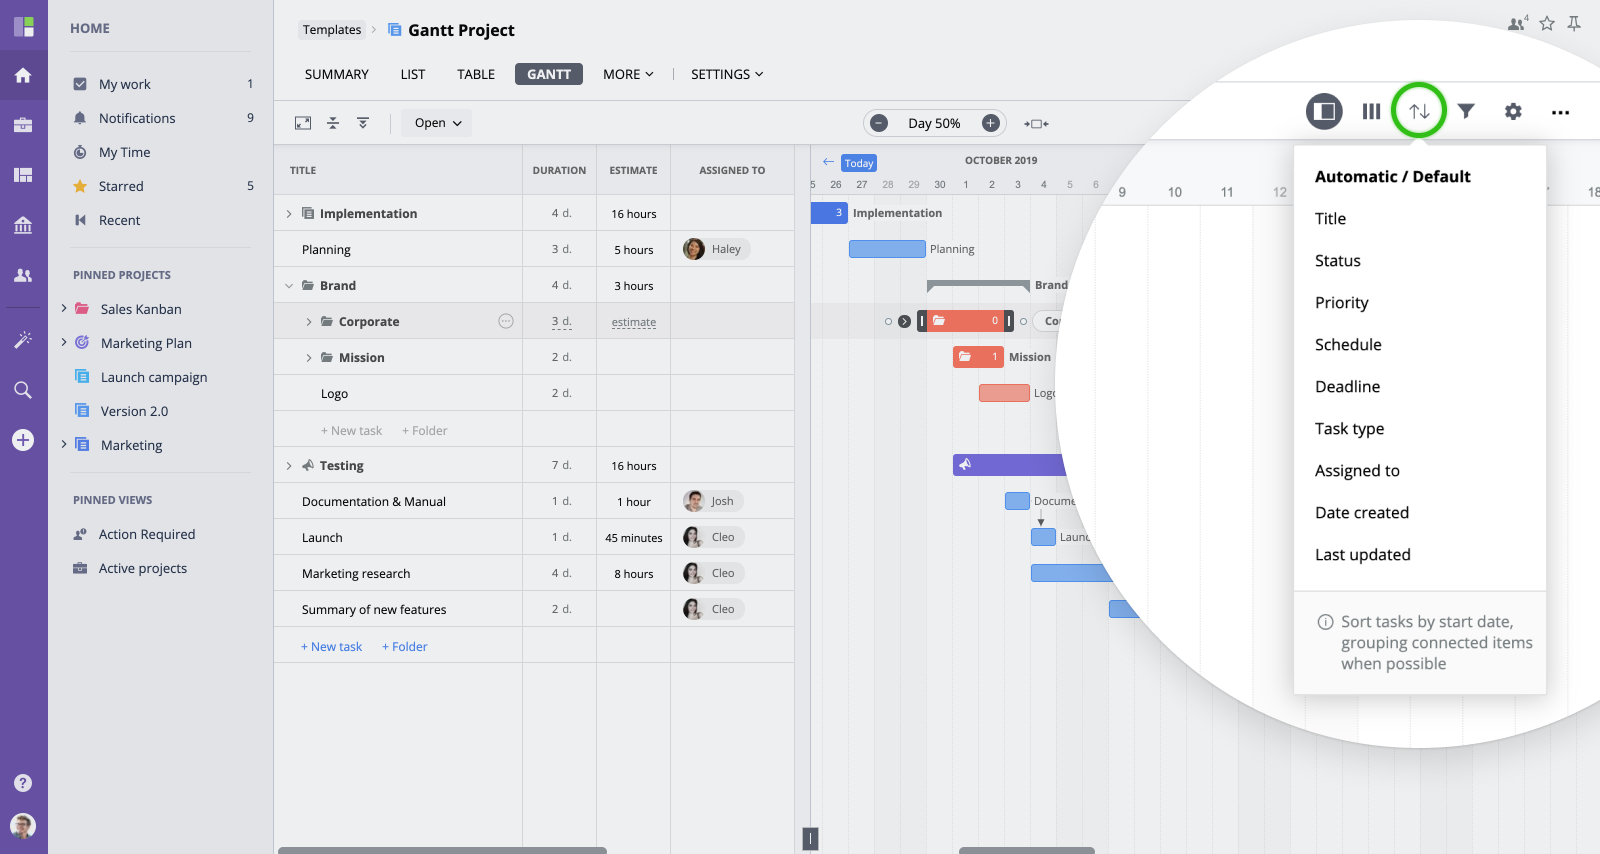
Please note that there are two arrows for every category except for 'Default'. ↓ - arrow means sorting in ascending order, '↑' - arrow means sorting in descending order.
- Default - means that all subprojects and workfolders will be shown in the order they have been created. Tasks will be shown per the default Gantt's chart logic - the further the task is from the current date, the lower its position in the task list.
- Title - all tasks, workfolders, and subprojects will be sorted in alphabetical order. '↓' - from A to Z,
'↑' - from Z to A.
- Status - sorting is done based on task status - from 'Not started', 'In progress', 'In review', etc. to 'Completed' and vice versa. '↓' - from 'Not started' to 'Completed', '↑' - from 'Completed' to 'Not started'.
- Priority - sorting is done here based on 'Priority' - if you choose '↓' - from 'Highest' to 'Lowest', '↑' - from 'Lowest' to 'Highest'.
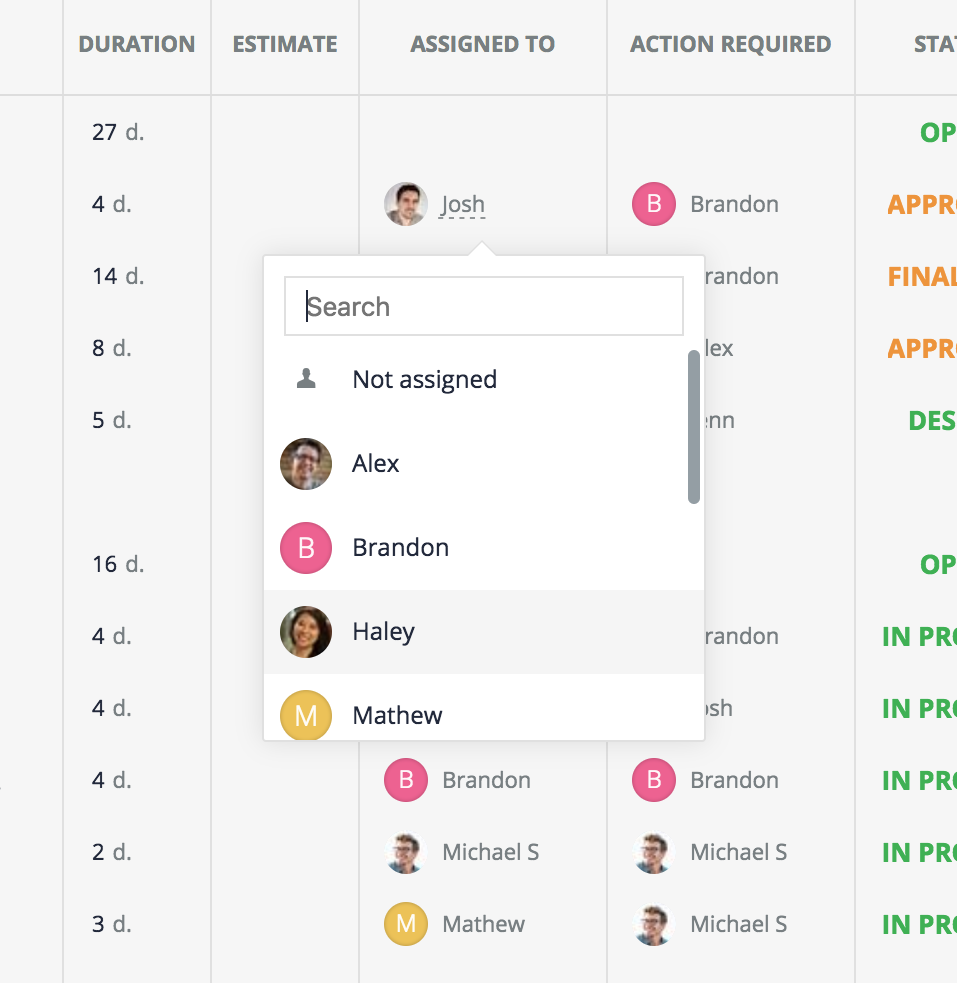
- Assigned to - the category which will show you the user who is assigned to this project. ↓ - users will be shown from A to Z. '↑' - users will be shown from Z to A.
- Action Required - will show you a user who is currently responsible for taking the next action on this particular task. '↓' - will show you users from A to Z while pressing on '↑' - you will see users from Z to A.
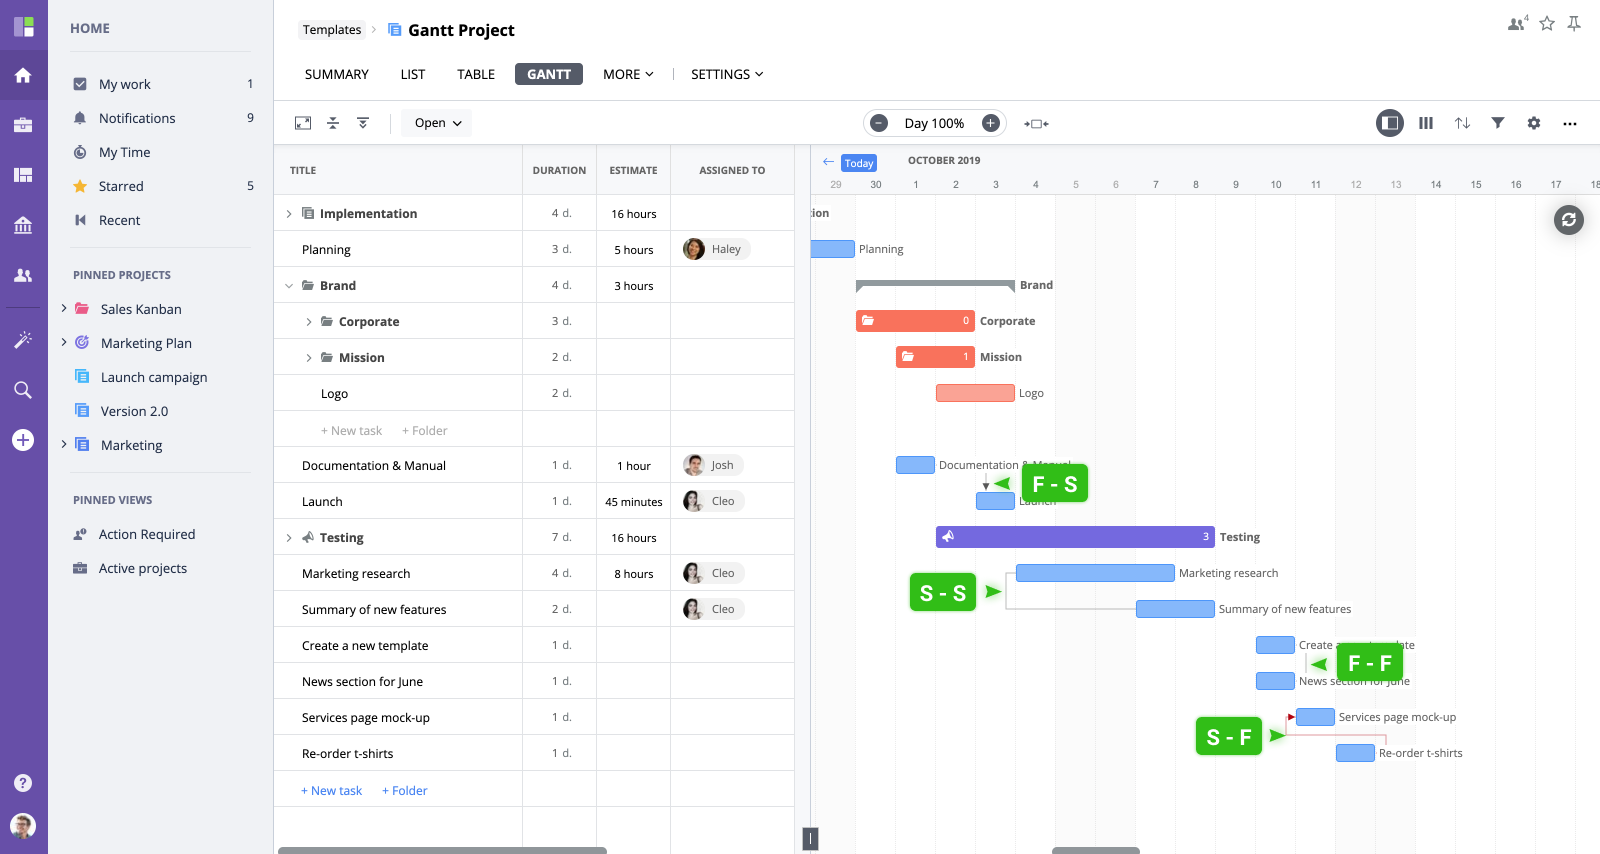
Dependencies
You can create 4 types of task dependencies in Timeline view in the Gantt chart:
- Finish to start (F-S) - Task A must finish before Task B can start.
- Start to start (S-S) - Task A must start before Task B can start.
- Finish to finish (F-F) - Task A must finish before Task B can finish.
- Start to finish (S-F) - Task A must start before Task B can finish.
How to create/delete dependencies:
- Create - mouse-over a task – small dots will appear on the right and left of the bar. Click a dot and drag your mouse to the start/end of the task/project you want to connect it to.
- Delete - click anywhere on the dependency line. Click the X button to delete.
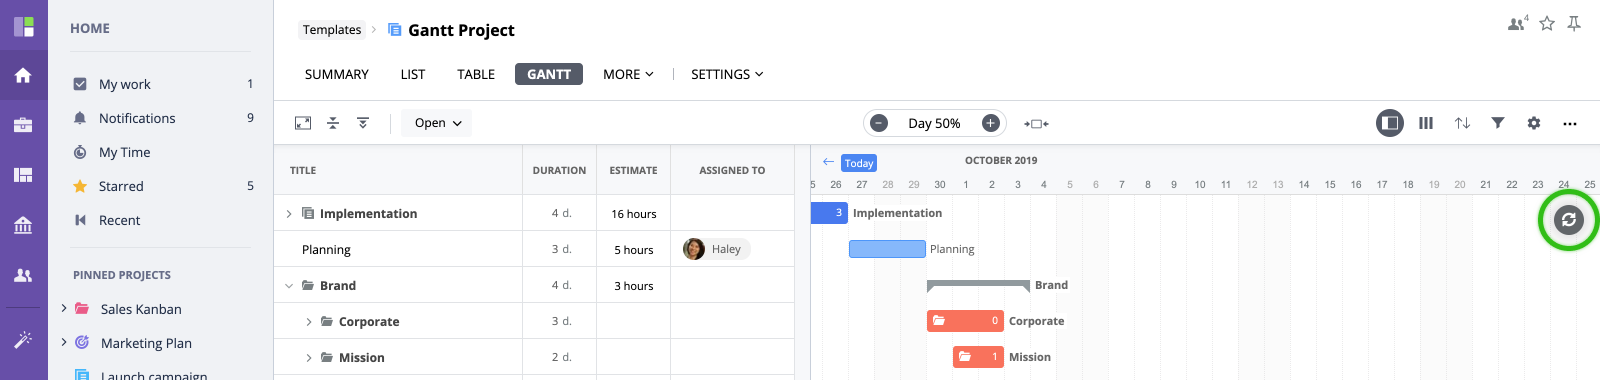
Refresh Button
This button will appear to the right of the button Sort by when you add/change tasks start/end dates. It is not visible when no changes are made to task dates. Once task date has been changed, you need to click this button in order for all tasks to be set in accordance with the Gantt chart logic.