Tasks Table
- Layout Overview
- Basic Functionality
- Creating New Tasks and Folders
- Managing Columns
- Sorting
- Filtering
- Bulk Edit
- Advanced Options
The Table View is an advanced task view that allows you to work with complex project structures, configure displayed data columns, and easily update tasks. Working with Table View is similar to working with a spreadsheet.
Layout Overview
Project Tasks Table section lets you browse and manage project tasks and subprojects within a well-organized and easy to manage table view.
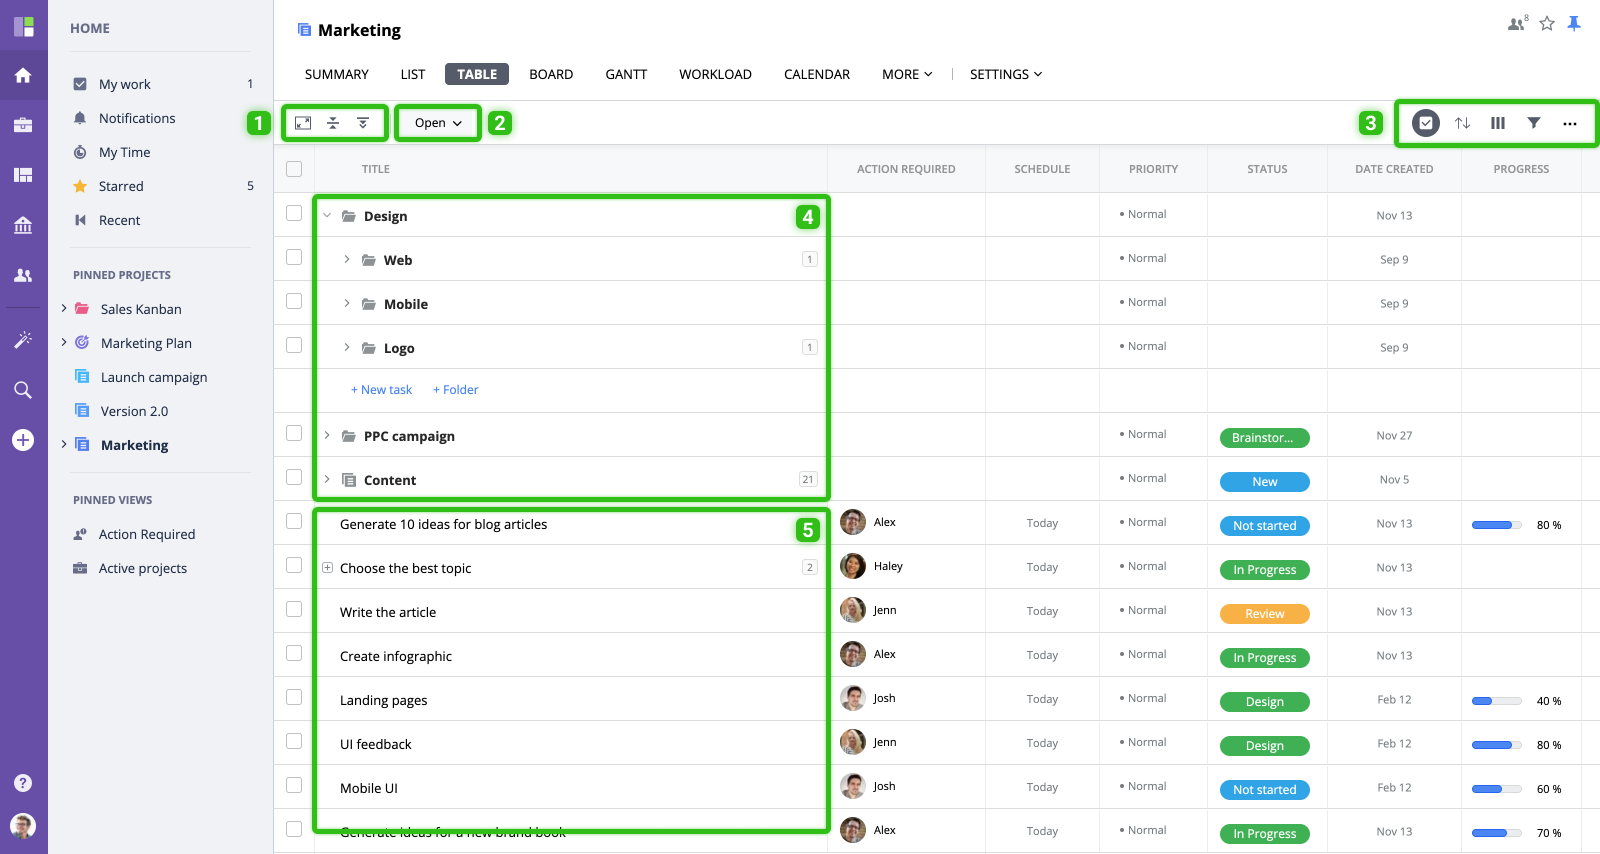
- Full Screen/Expand/Collapse all
- Open/Closed/All
- Management & settings options
- Subprojects / folders
- Project tasks list
Basic Functionality
- Click a task title to view the task.
- Click a subproject/folder to open it.
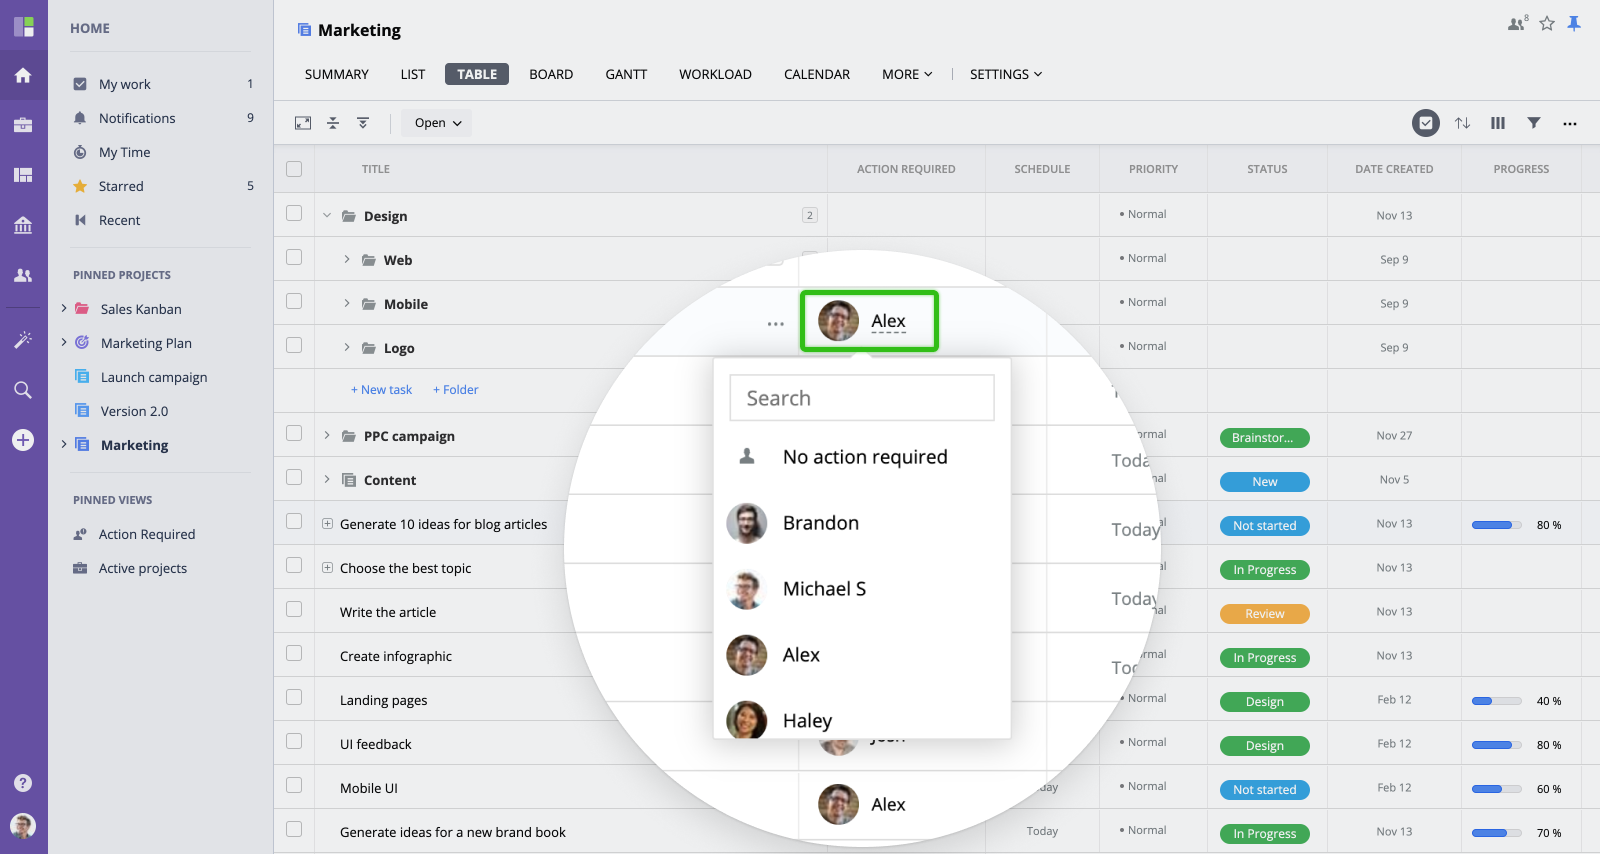
- Click any field (i.e. status, priority, schedule, user, etc.) to update.
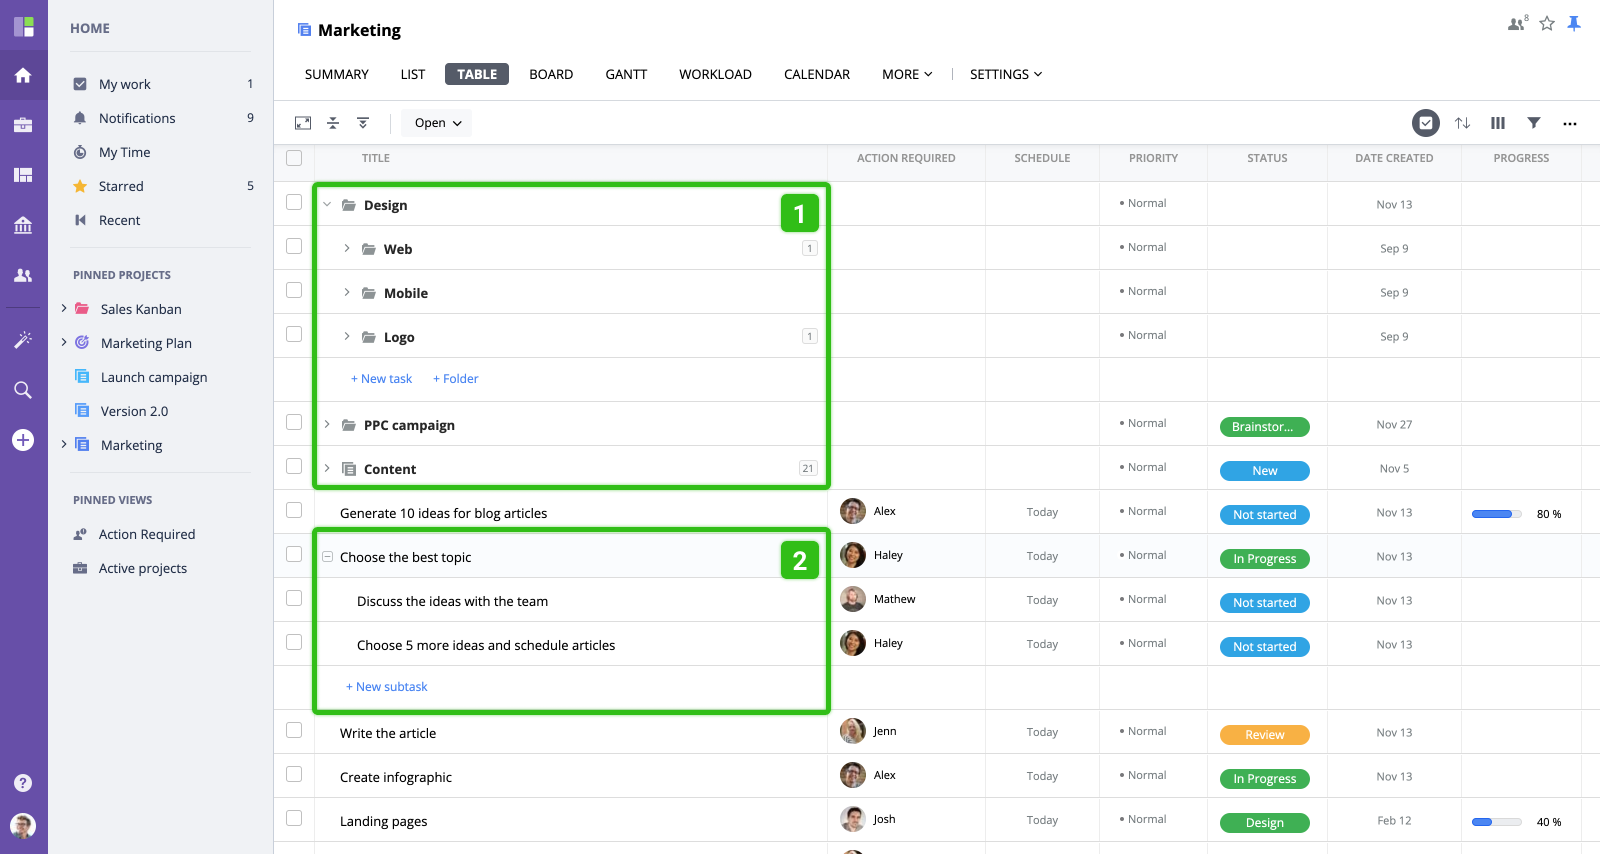
- Expand projects/folders to view tasks and folders inside . To see the task's subtasks, click the "+" next to the task's title, and to add a new one, click "+" button .
- Drag and drop tasks/folders into a folder to move. Drag and drop tasks to rearrange their order.
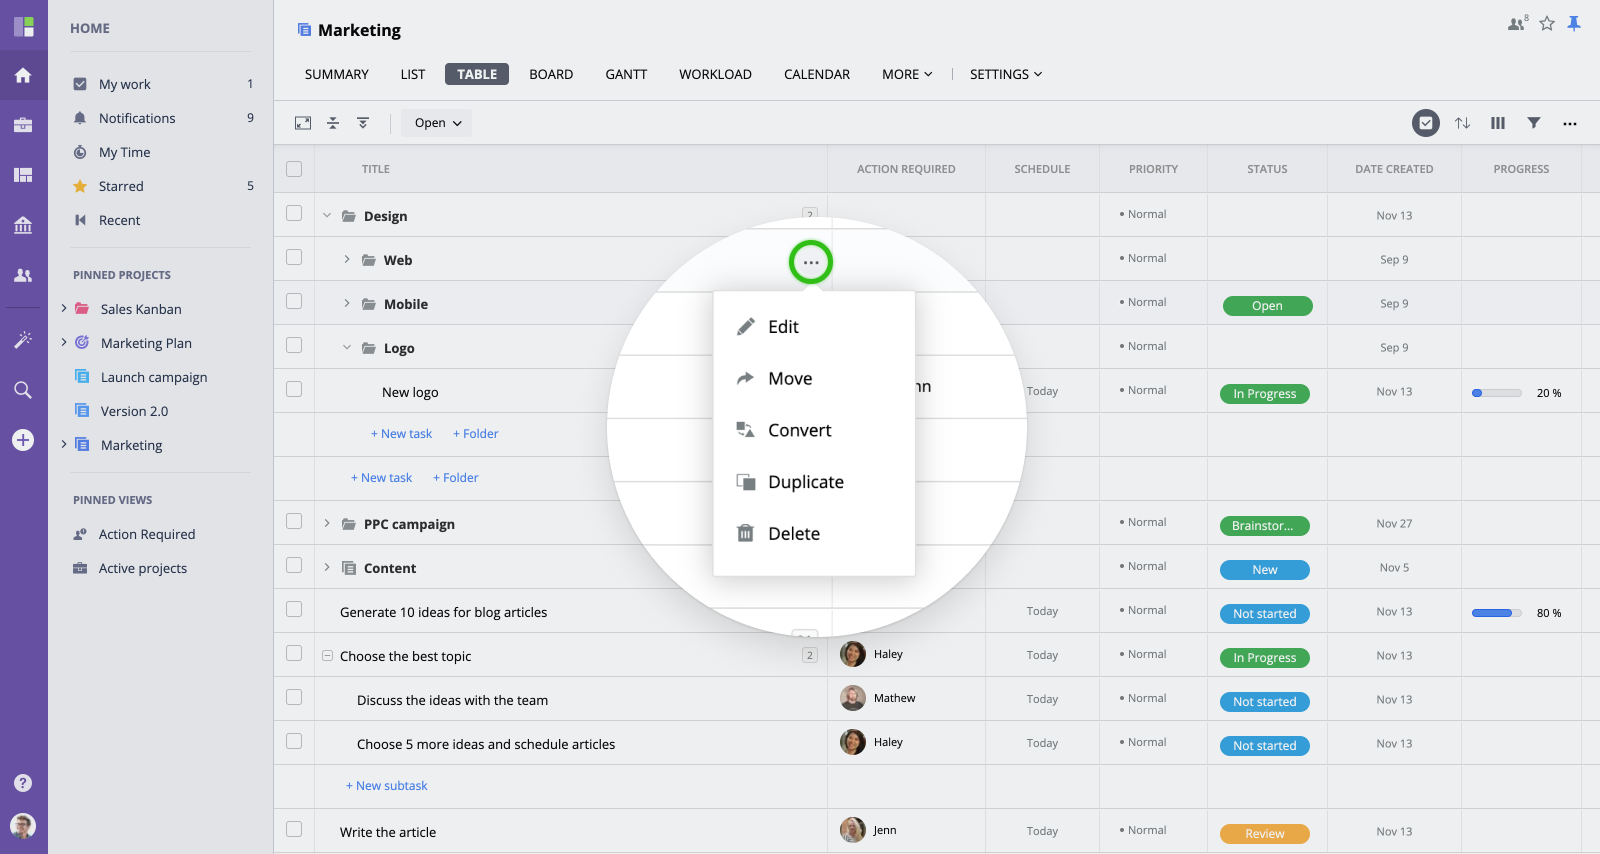
- Click More to access the advanced management options (delete, move, recurrence, edit, convert).
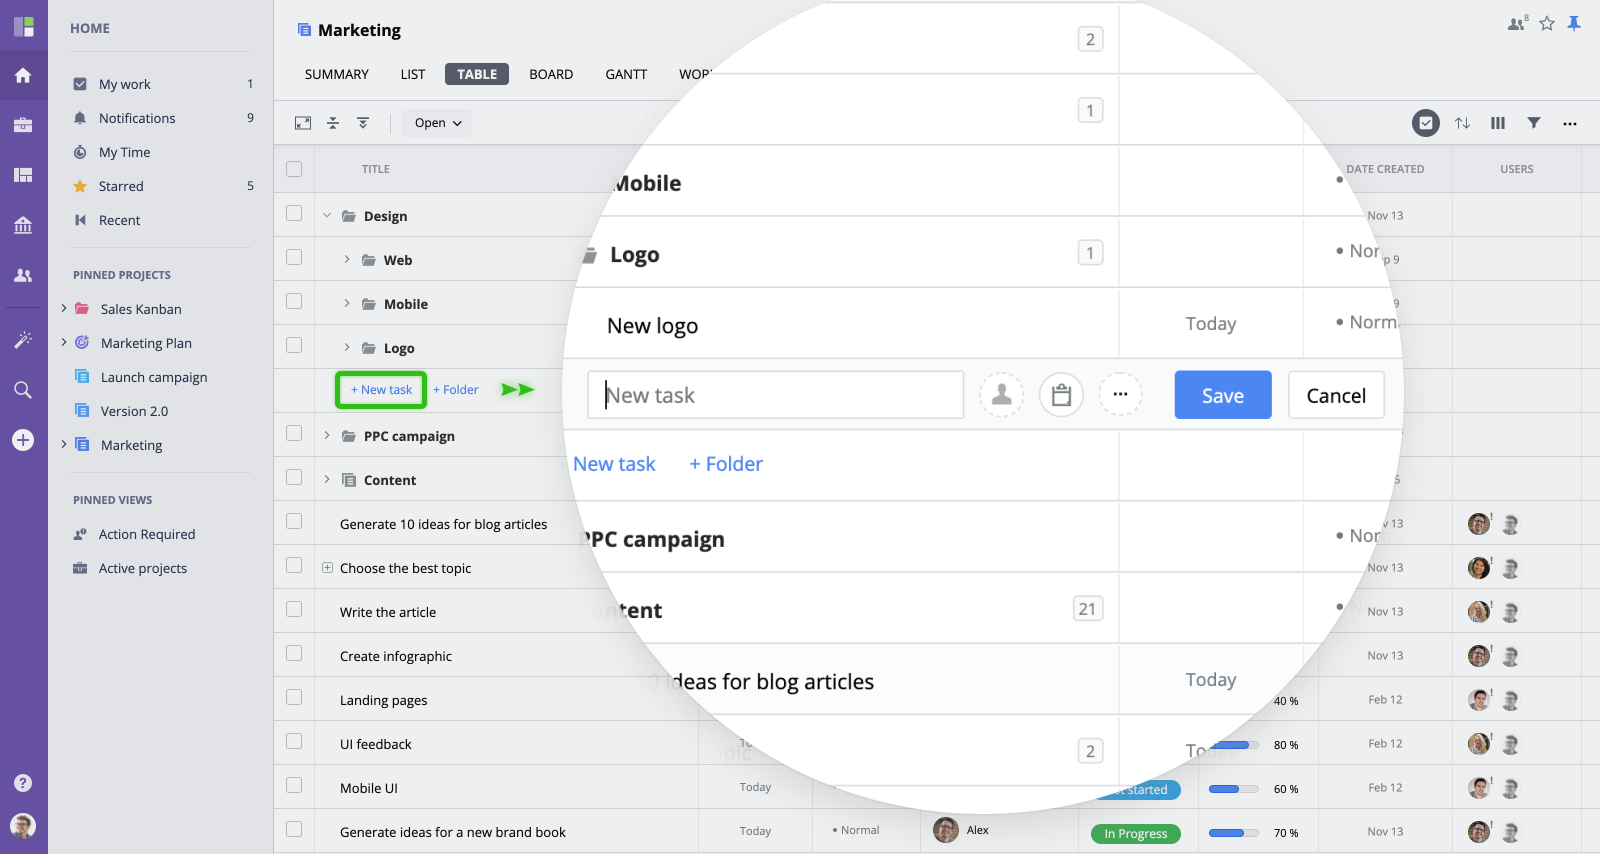
Creating New Tasks and Folders
Click New task to create a new task and New folder to add a subfolder to your project. Enter details and hit Enter or click Submit to save.
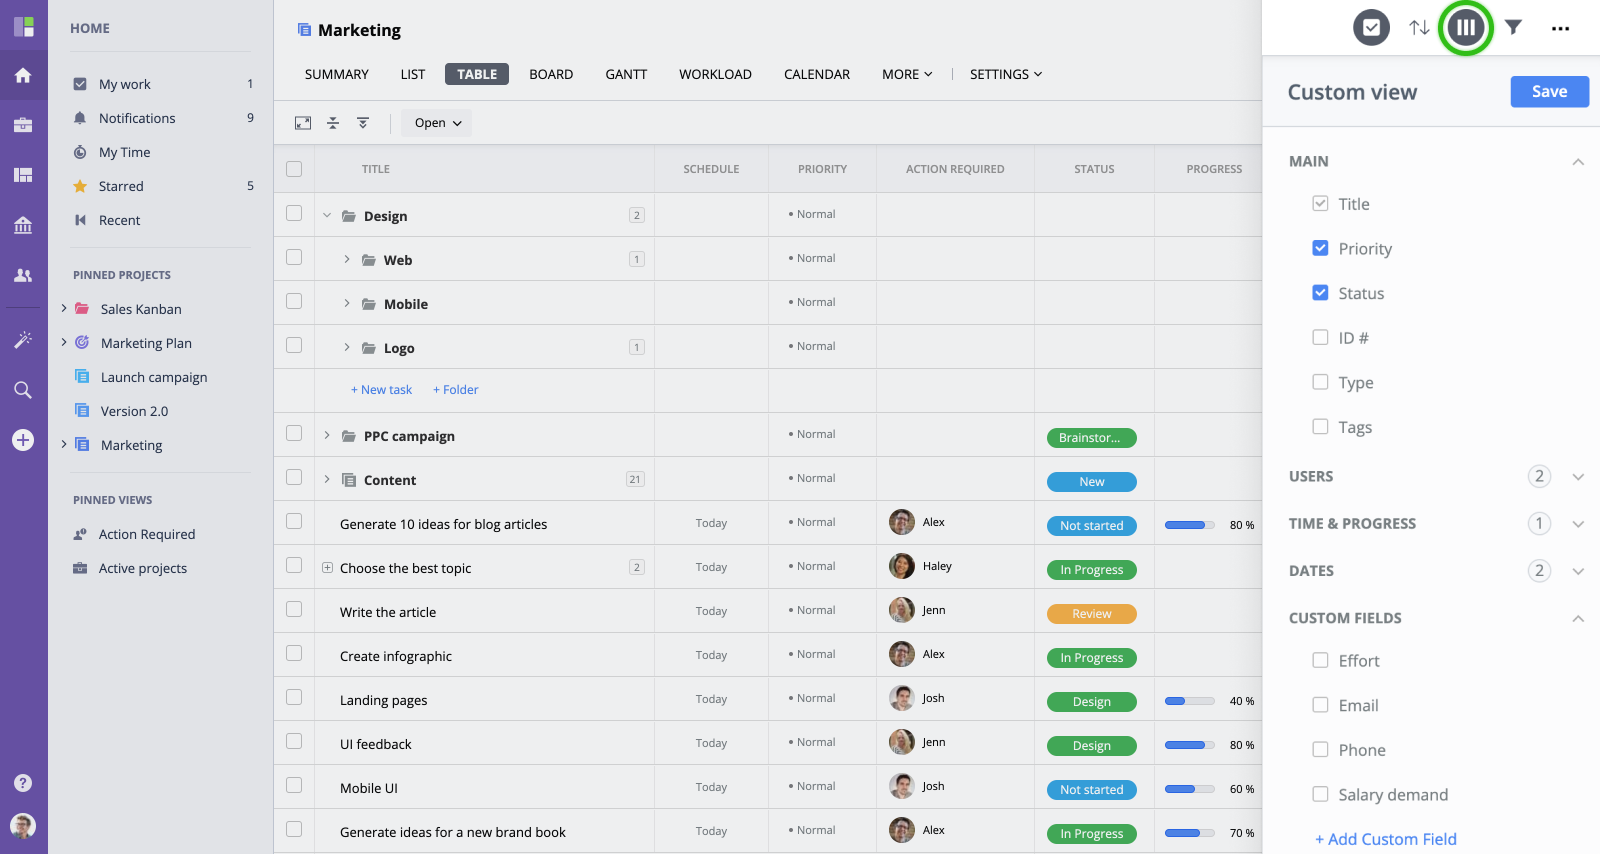
Managing Columns
You have full control over the columns (task fields) that are displayed in the Table View. To configure visible columns, click Columns button in the management section of the header. Then select the columns you want to display from the list in the right panel:
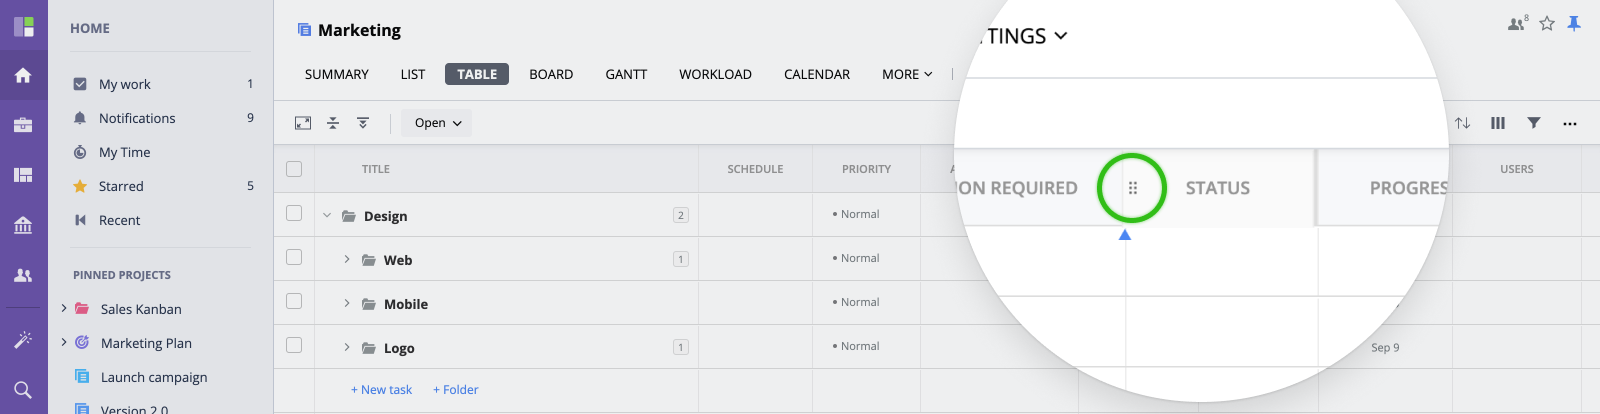
To rearrange columns, mouse-over a column name and drag and drop the column to a new position.
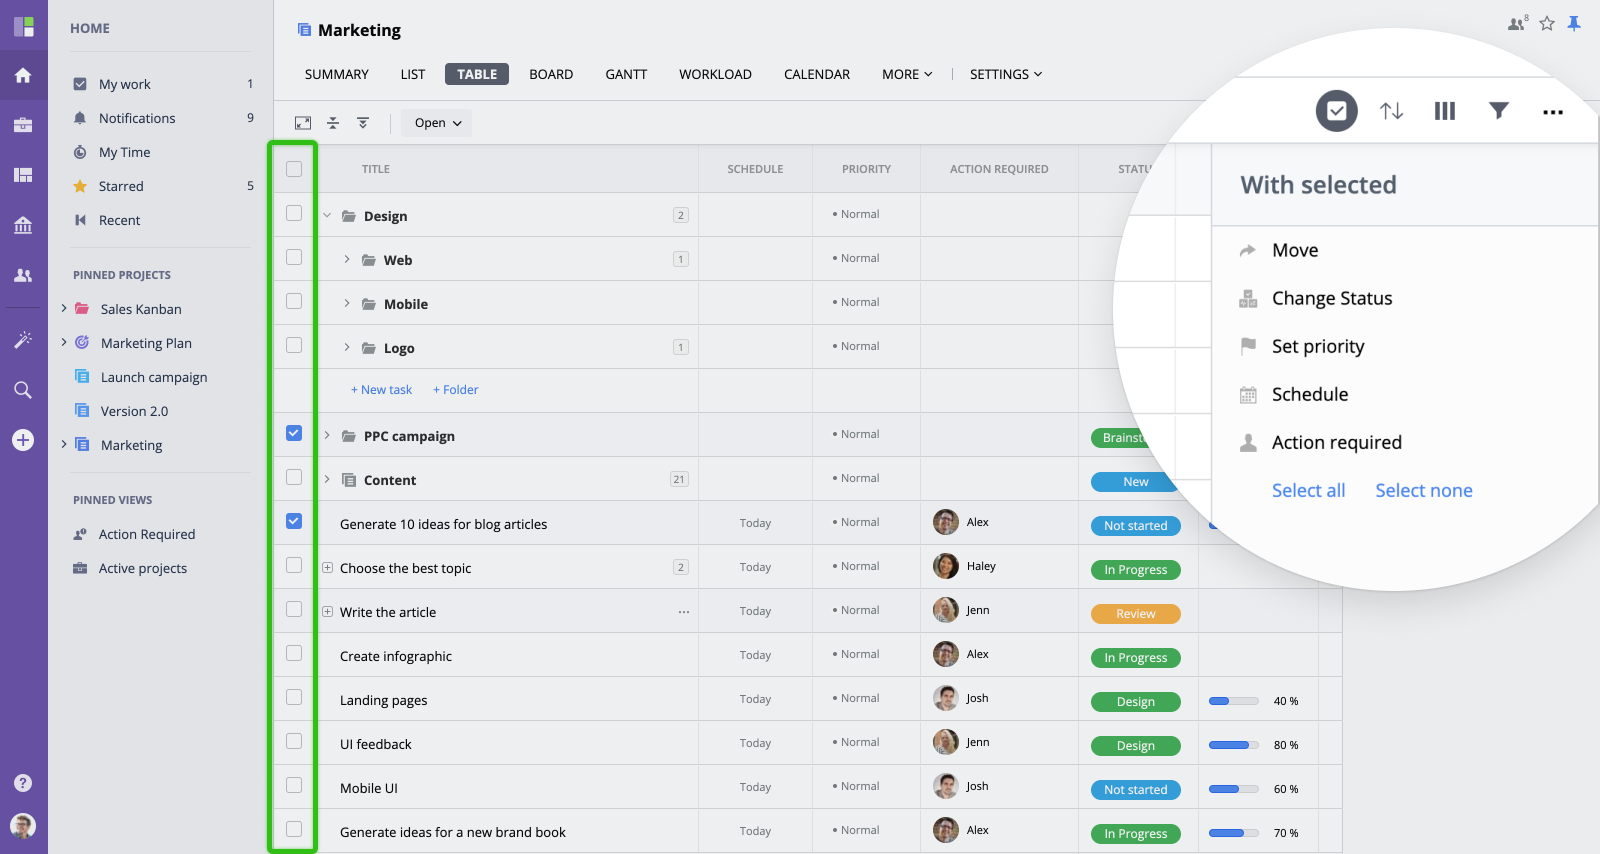
Bulk Edit
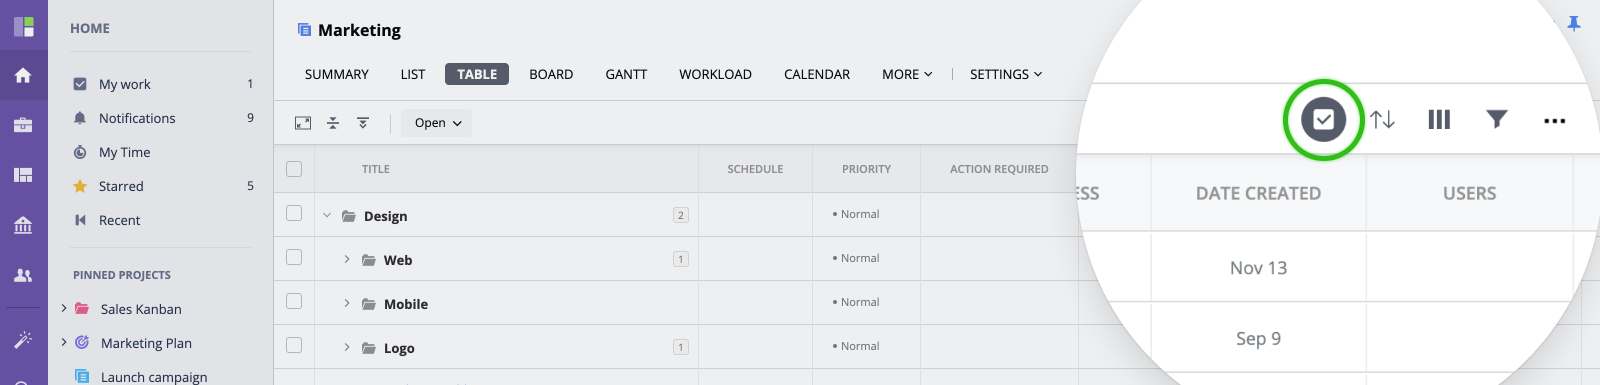
To update multiple items at once (i.e. update status, move, etc.) you can use bulk edit option. First of all, make sure it’s enabled, by clicking the "Checkbox" icon in the header:
Then, select the items you want to update and select an action from the panel on the right:
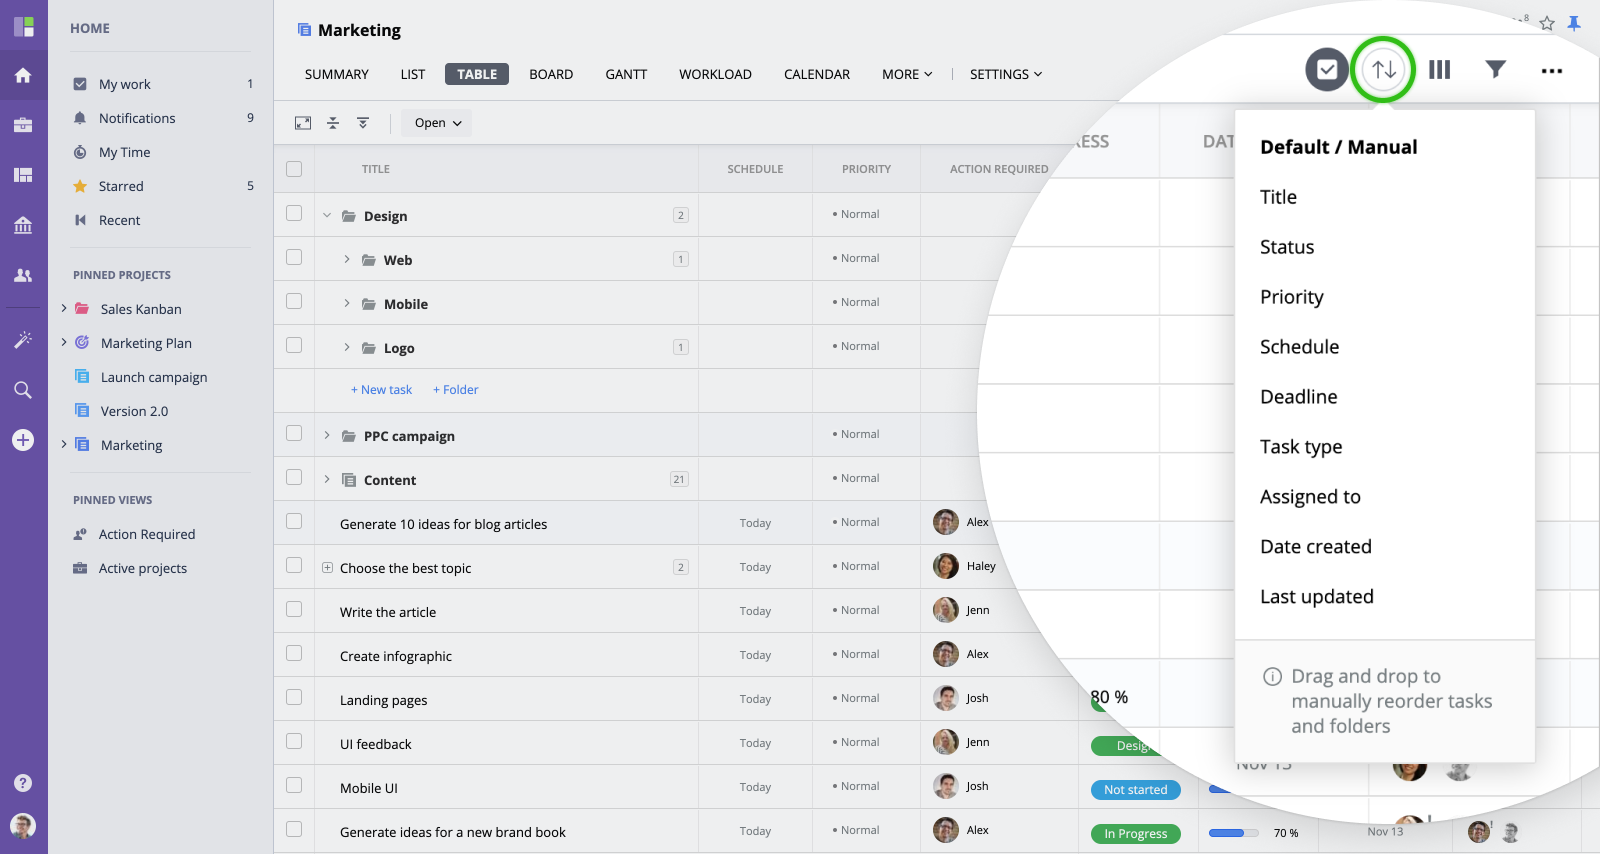
Sorting
By default, your tasks appear in the order they have been created and you can manually reorganize them.
To sort the list by a specific field, select it from the “Sort by” menu. Click Down arrow to sort in descending and Up arrow to sort in ascending order:
Filtering
If you have a long tasks list and want to narrow down your view, use filter option. You can filter by different criteria such as type, user, date updated, and more:
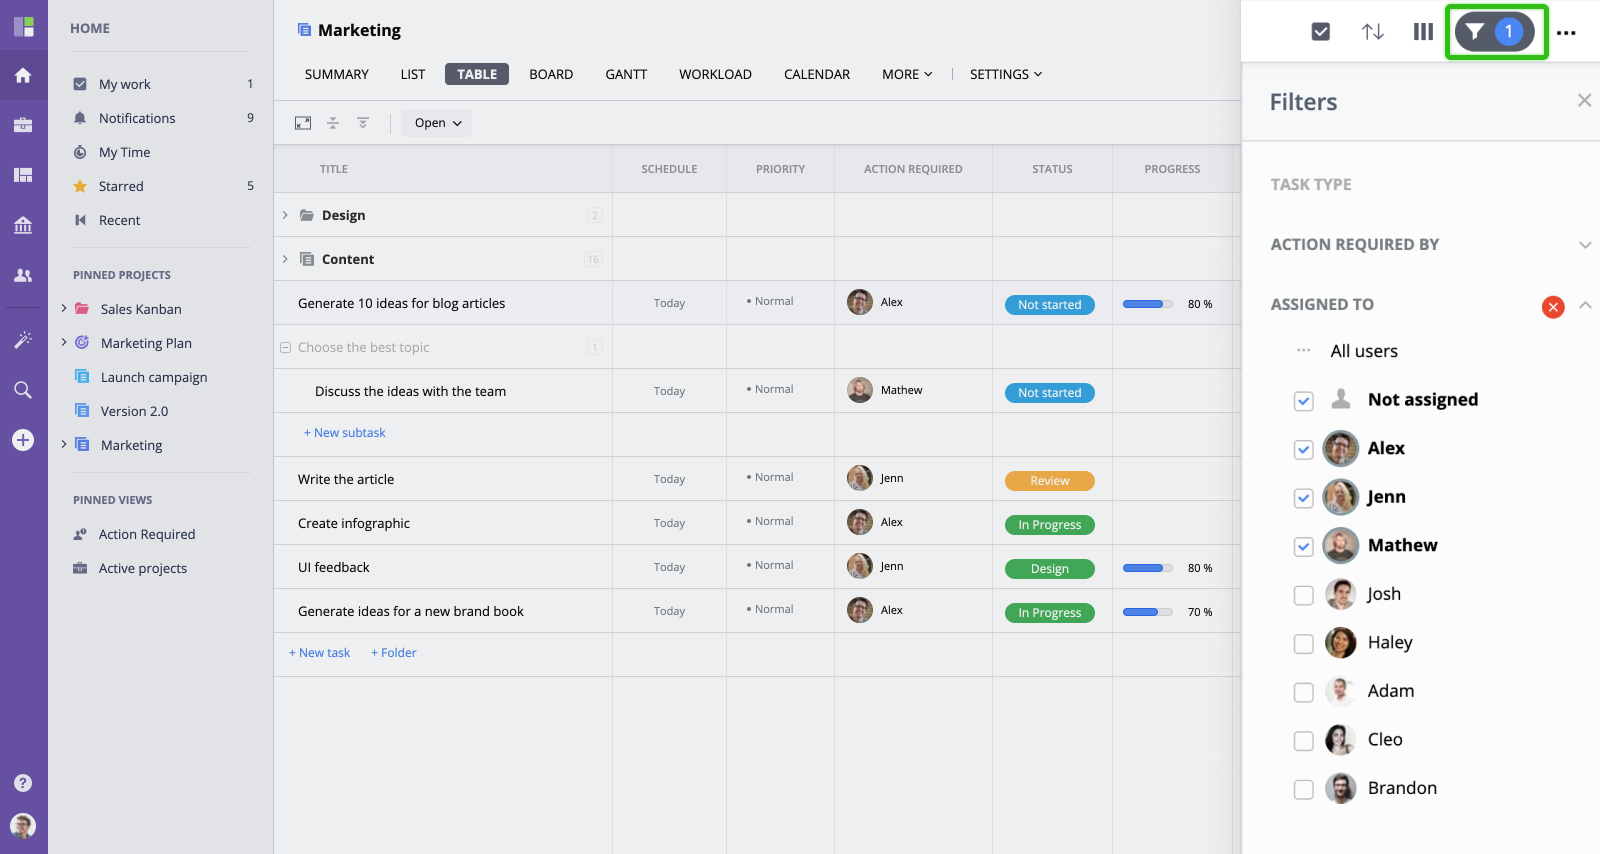
Note that you can combine multiple filters. To reset a filter, click "X" button next to the filter name.


