Custom Fields
Custom fields allow you to customize your work items extending their list of available fields with the ones your need to closely match GoodDay workflows to your business processes. The use of custom fields helps managing work of different departments under one platform and can significantly increase productivity.
In this article you will learn about:
- Managing custom fields
- Creating a custom field
- Types of custom fields
- Assigning custom fields to task types and projects
- Working with custom fields
Managing Custom Fields
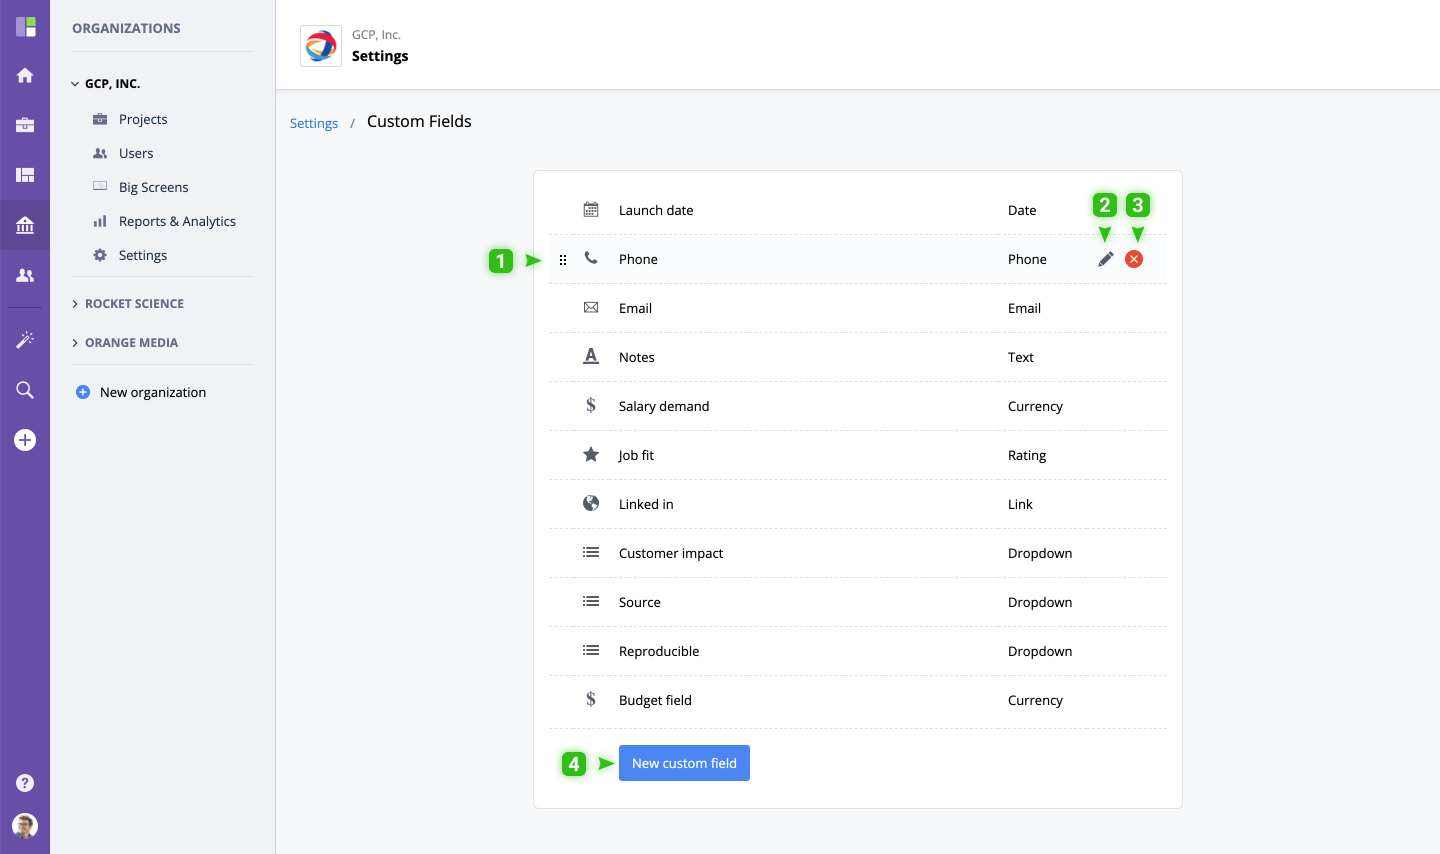
To manage your organization's custom fields, go to Organization / Settings and click "Custom fields":
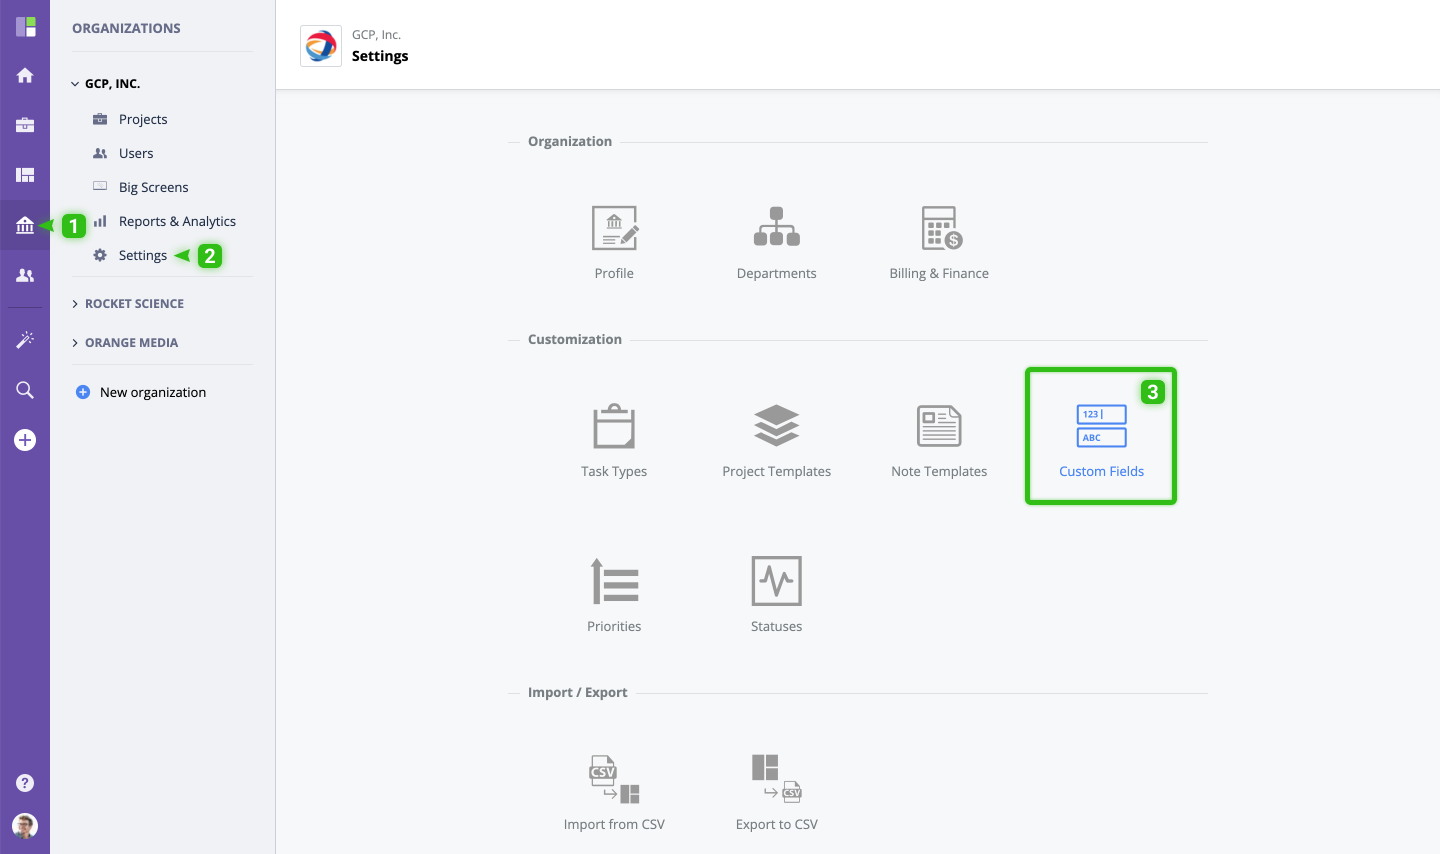
You will see the list of all existing task types.
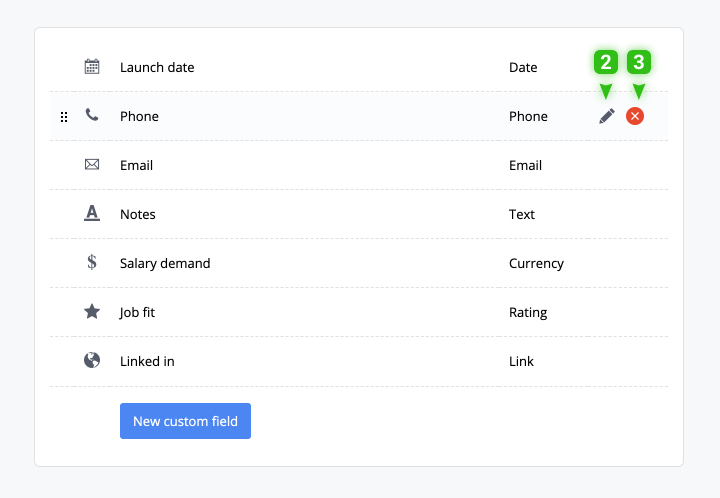
- To order, drag and drop a custom field to a desired position within the list.
- To edit, click the "Edit" button
- To delete, click the "Delete button
- To create a new field, click the "New Custom Field" button
Creating Custom Fields
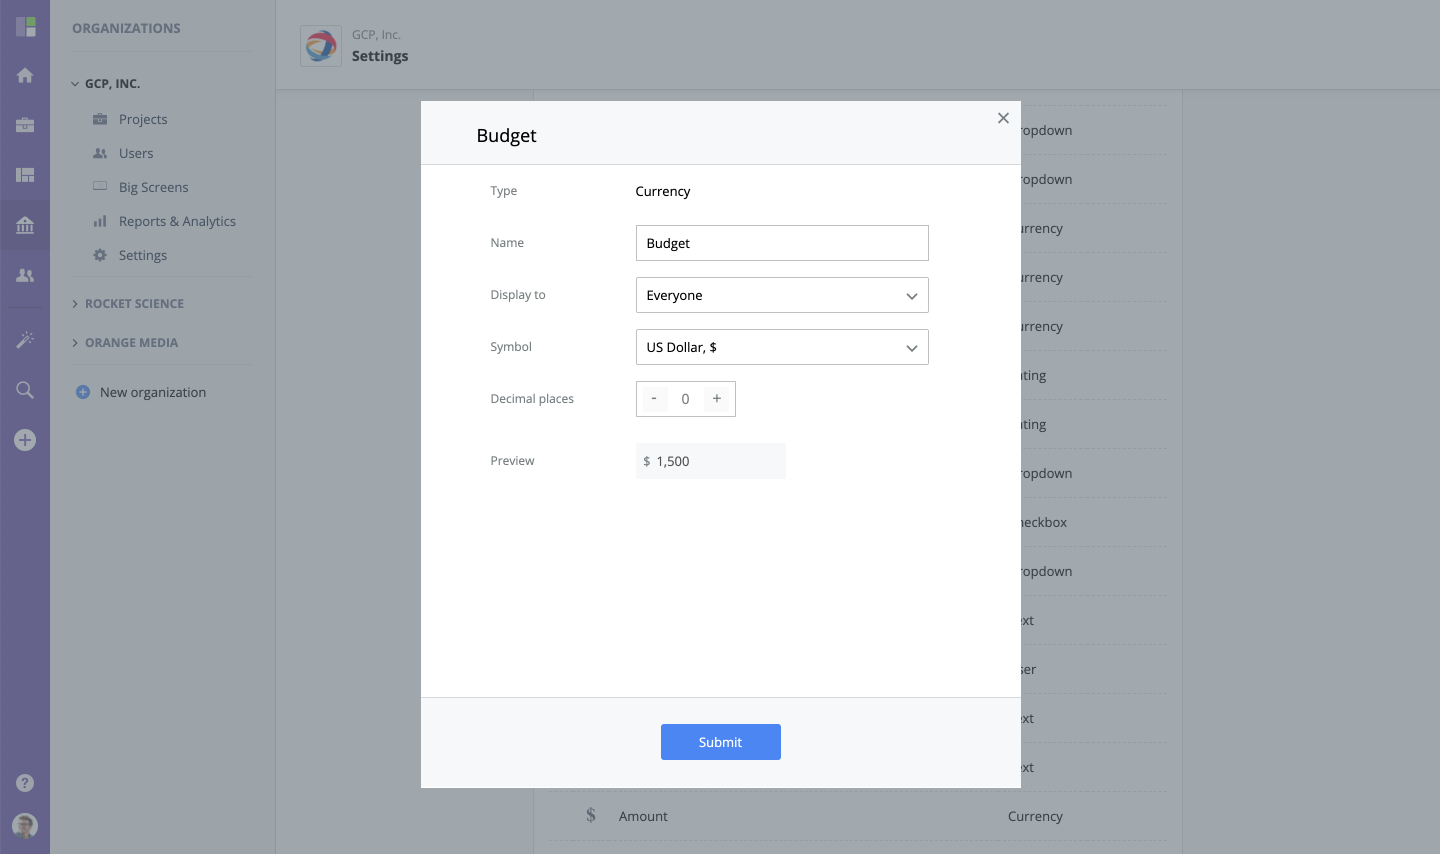
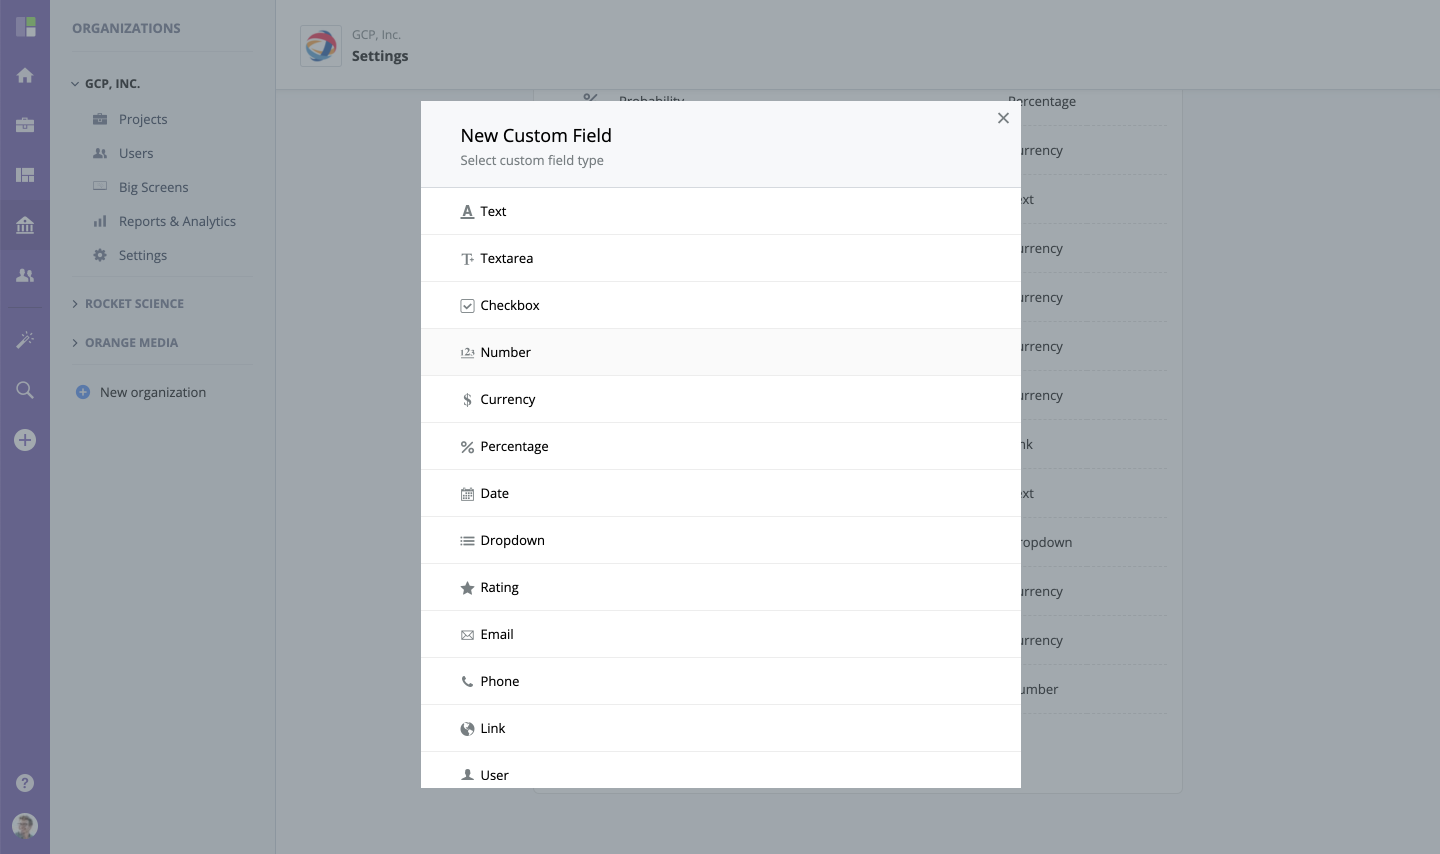
When you click "New custom field", a modal window with the following fields will pop up:
- Name - new custom field name/label.
- Type - field system type.
- Display to - allows you to display the field to all users or to organization's managers only.
- Preview - preview of a custom field, to see what it will look like in the task view.
Depending on the field type, other options may be available, e.g. Decimal places as shown on the screen below:
Custom Field Types
The available types may vary based on your account license. By default, the following custom field types are available:
| Type | Description |
|---|---|
| Number | Use when you need to store a numeric value. Set decimal places to 0 for integers. |
| Text | Any string or long text. |
| Dropdown | Use when you need to be able to select a value from a preset list of options. |
| Date | Use to track specific dates, other than the deadline. |
| Currency | Use to track budgets or any other currency-specific fields. |
| Percentage | 0-100% |
| Checkbox | Yes/No fields. |
Assigning Custom Fields to Task Types and Projects
To add custom fields to a specific task type, go to Organization - Settings - Task Types and select the task type you want to modify. Then "Add custom field" in "Custom fields" section of the task type settings screen. Learn more about managing task types here.
Working with Custom Fields
After a custom field has been added in the Settings, you can access it in the Task view.
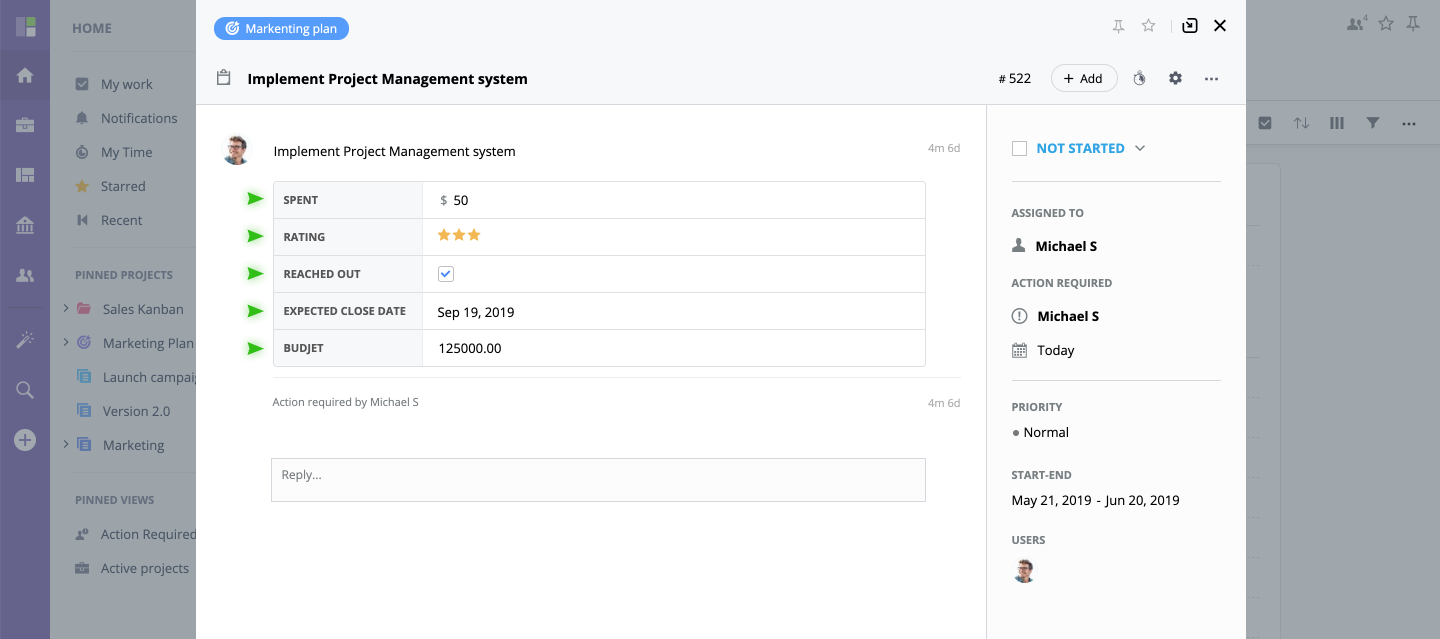
If you are a user with full access level to this folder, you can also create and view custom fields in the Task table view.
Select Columns icon in this view and press on + Add Custom Field at the bottom of all task fields below the horizontal line.
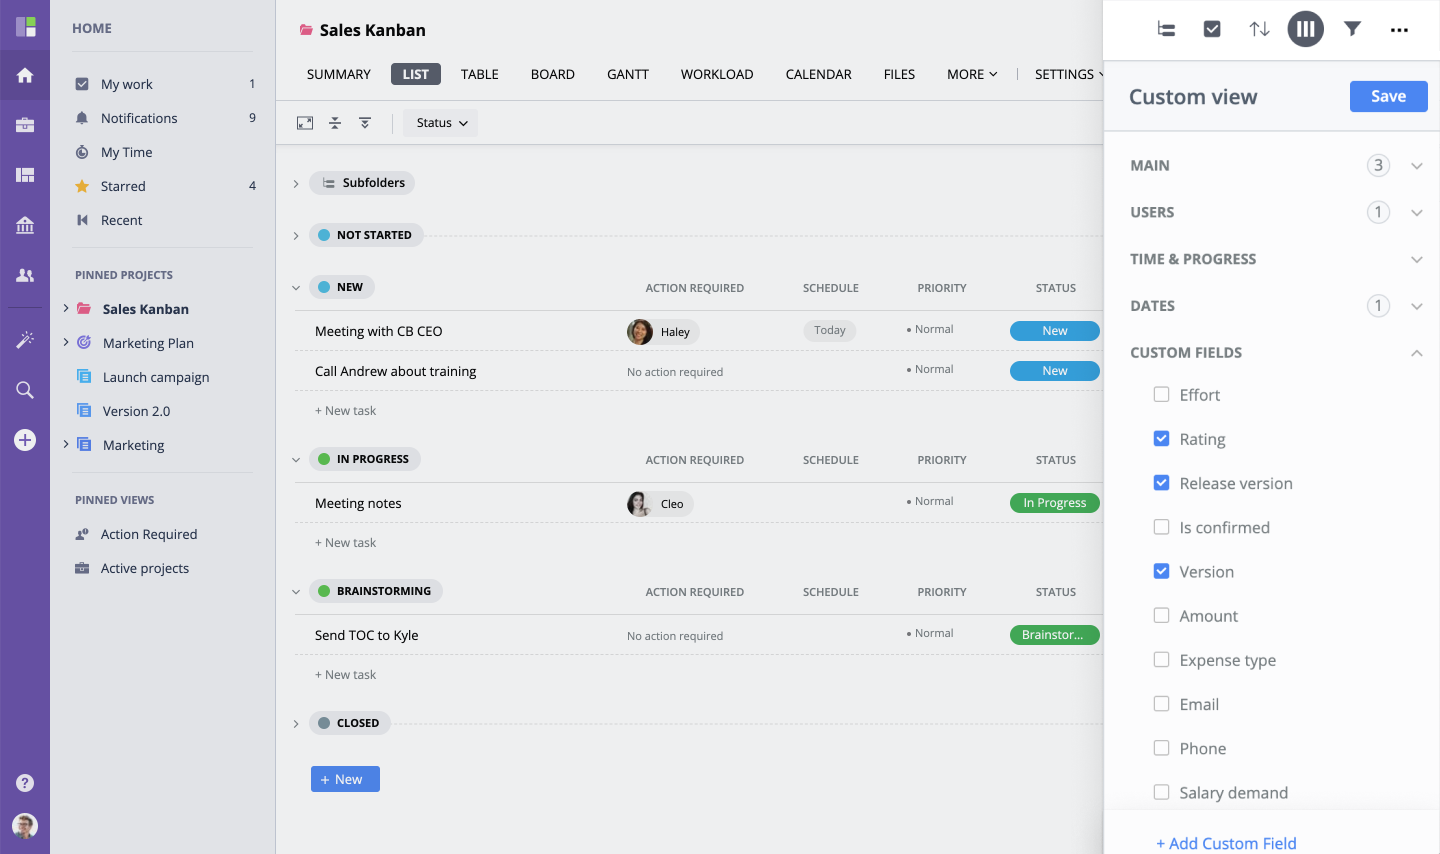
Or, simply set the checkboxes next to custom fields you wish to view in Task table.
Edit and Delete
To edit or delete any custom field in your organization, move your mouse over it and select a pencil or x mark on the Custom fields settings page.